Meta, Instagram & Facebook Ads Setup Tutorial by Feedbackwrench
How to setup the right Facebook things, add us as your partner, and give us full access.


Meta & Facebook Ads Setup Tutorial 2024
How to setup Meta Ads, Facebook Ads & Instagram Ads and properly add an agency.
We're going to setup the right Facebook, Meta and Instagram assets, then show you how to add in an agnecy as a partner.
Best way to share Instagram Access & Facebook Access with an Advertising Agency
This is a tutorial on how to properly give access of your ad account, facebook page, instagram page and Meta Ad account.
Do not give your password to an agency unless absolutely necesary.
If you do this setup right the first time, and learn how to do it in the future, you won't have any nightmare scenarios.
You should always have Two Way Authentication Turned on for your Google Ads and Facebook ads.
We personally know a dozen or so people who had their Facebook Account stolen from them, and the main reason is that either their account, or someone in their business account, did NOT have two way authentication on.
Getting Started Setting Up Meta/Facebook/Instagram Ads for Agency:
First off, please log out of every other Facebook profile & Instagram profile that IS NOT your core profile with business access.
Log out of other profiles, so you avoid the mistake of hooking these up to the wrong account.
A - Create a Business Page.
You will need to create a Facebook Business page for your business.
Fill it out as much as possible, complete the images, email, phone and web address.
Over time, add in some posts and get things warmed up.
B - Create an Instagram page for your business & convert it to a business page
Instagram & Facebook are slowly becoming one.
You should setup both of these in order to run Meta ads on both of the platforms.
Running ads on just Facebook or only Instagram doesn't make much sense, so we need to setup an instagram account for the business.
Setup a Business Instagram Using Your Phone
You'll want to get your phone, log into your Facebook App, and then download the Instagram app as well.
Doing this on a computer doesn't work.
Create an Instagram for the business, using the phone, until you get to the finish line.
Don't forget your passwords!
B.2 - Convert the Instagram Page to a professional page.
Using your phone, go to your instagram page.
Hit the little icon in the lower right, to go to your main page.
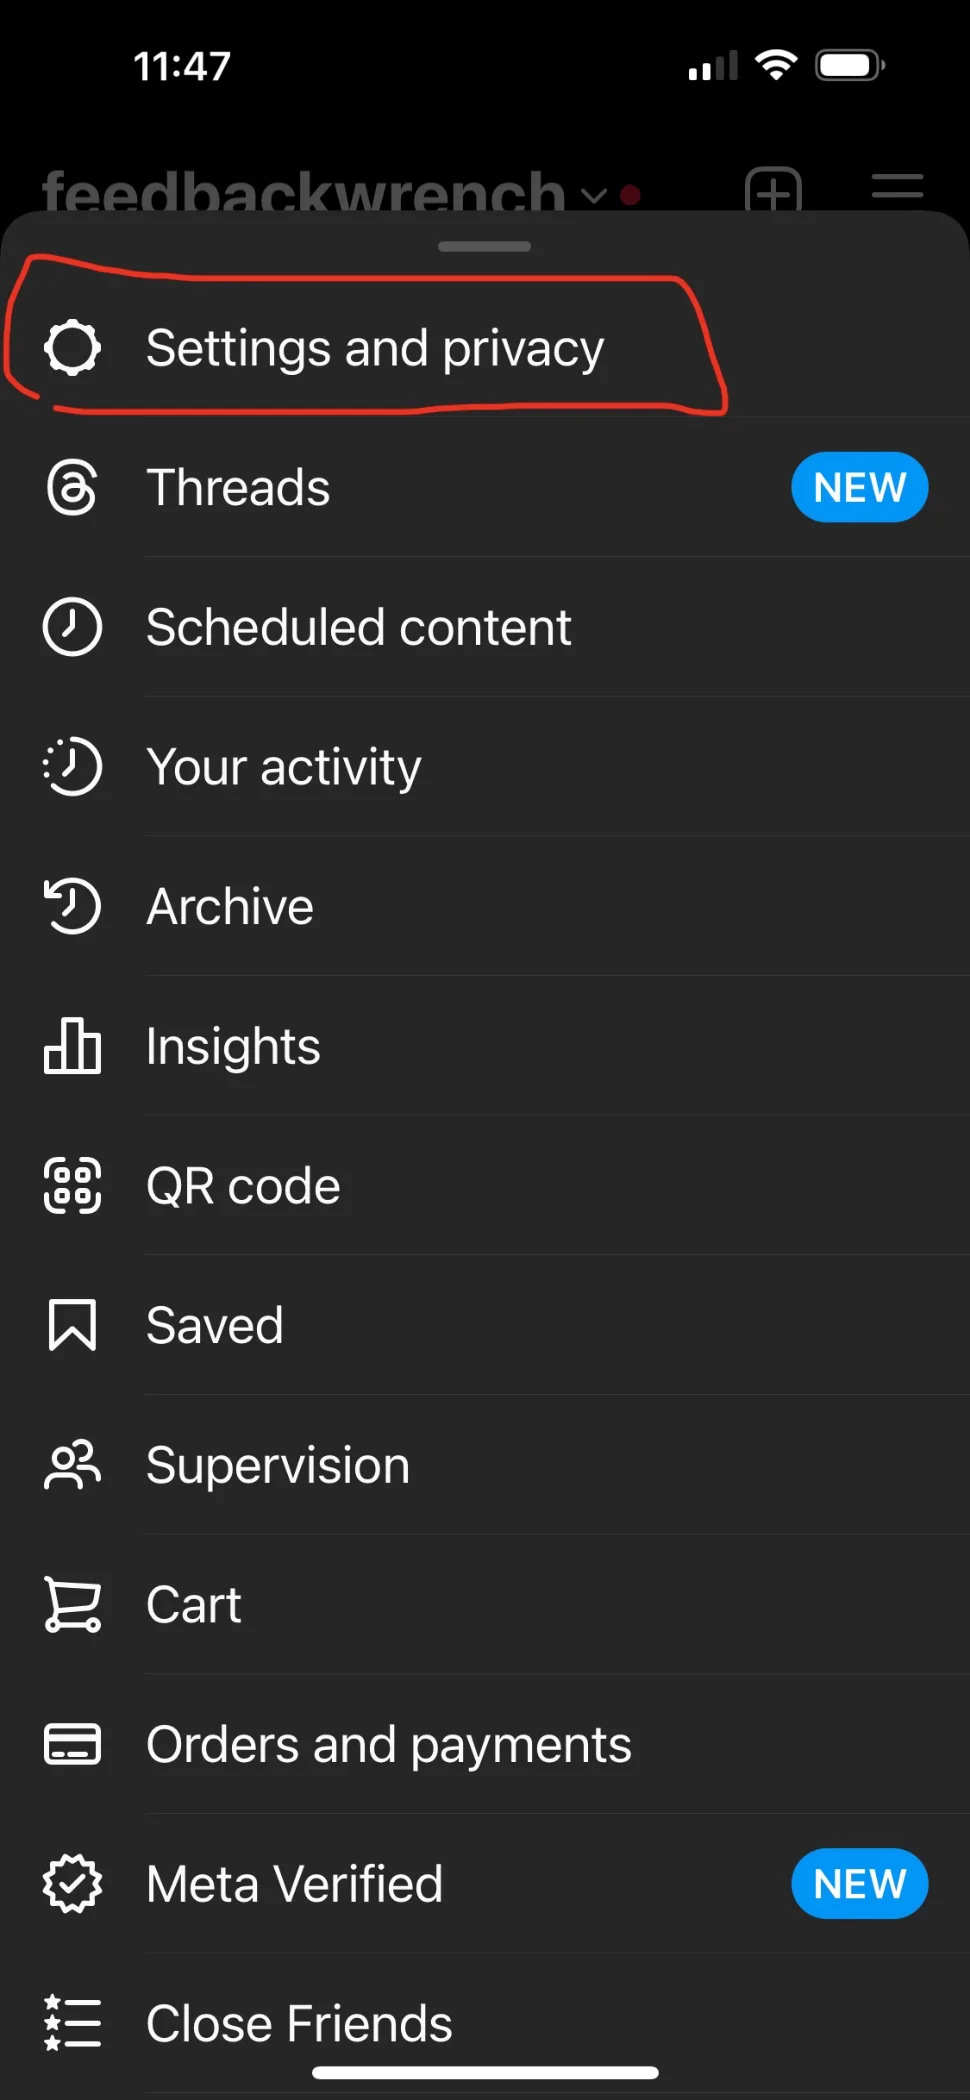
Now, hit the menu in the upper right corner.

Go to the Settings and Privacy Gear
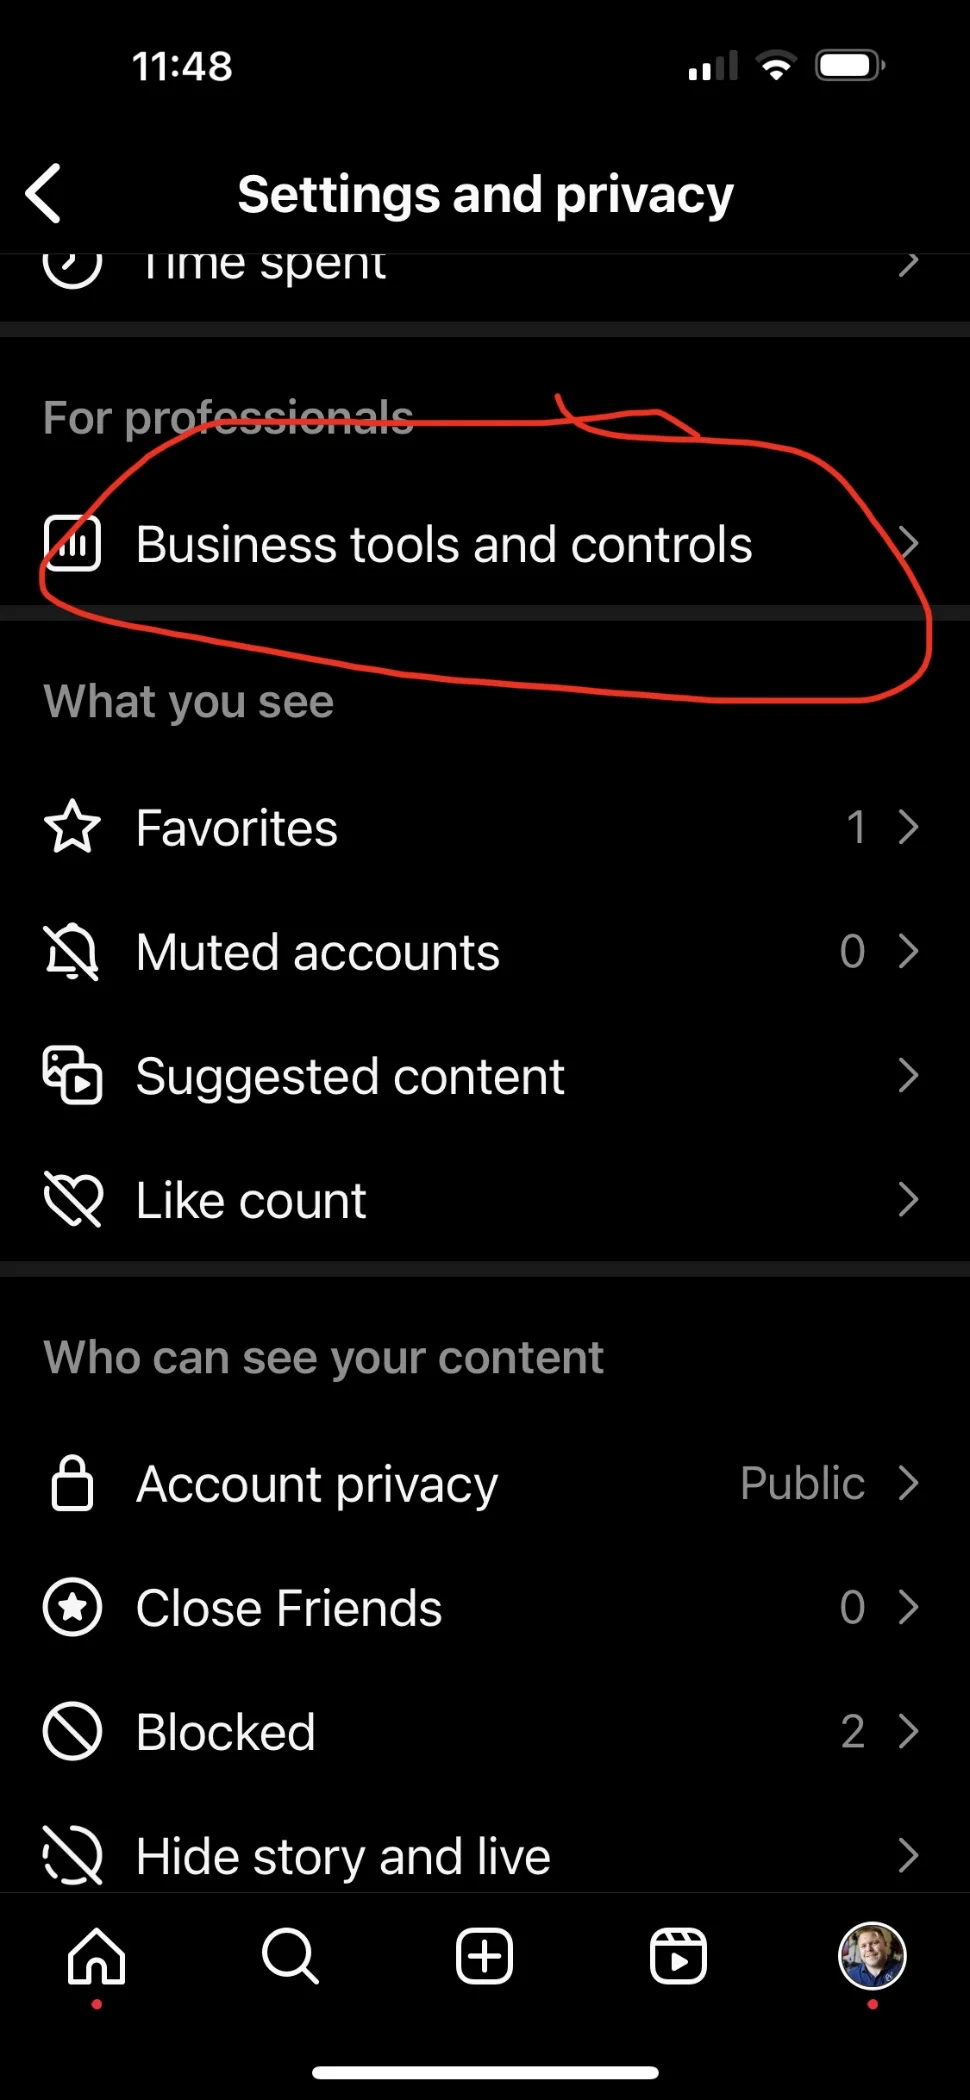
Go to Business Tools and Controls under the "for professionals"
Go down to "switch account type" in the instagram account, so we can choose Business.
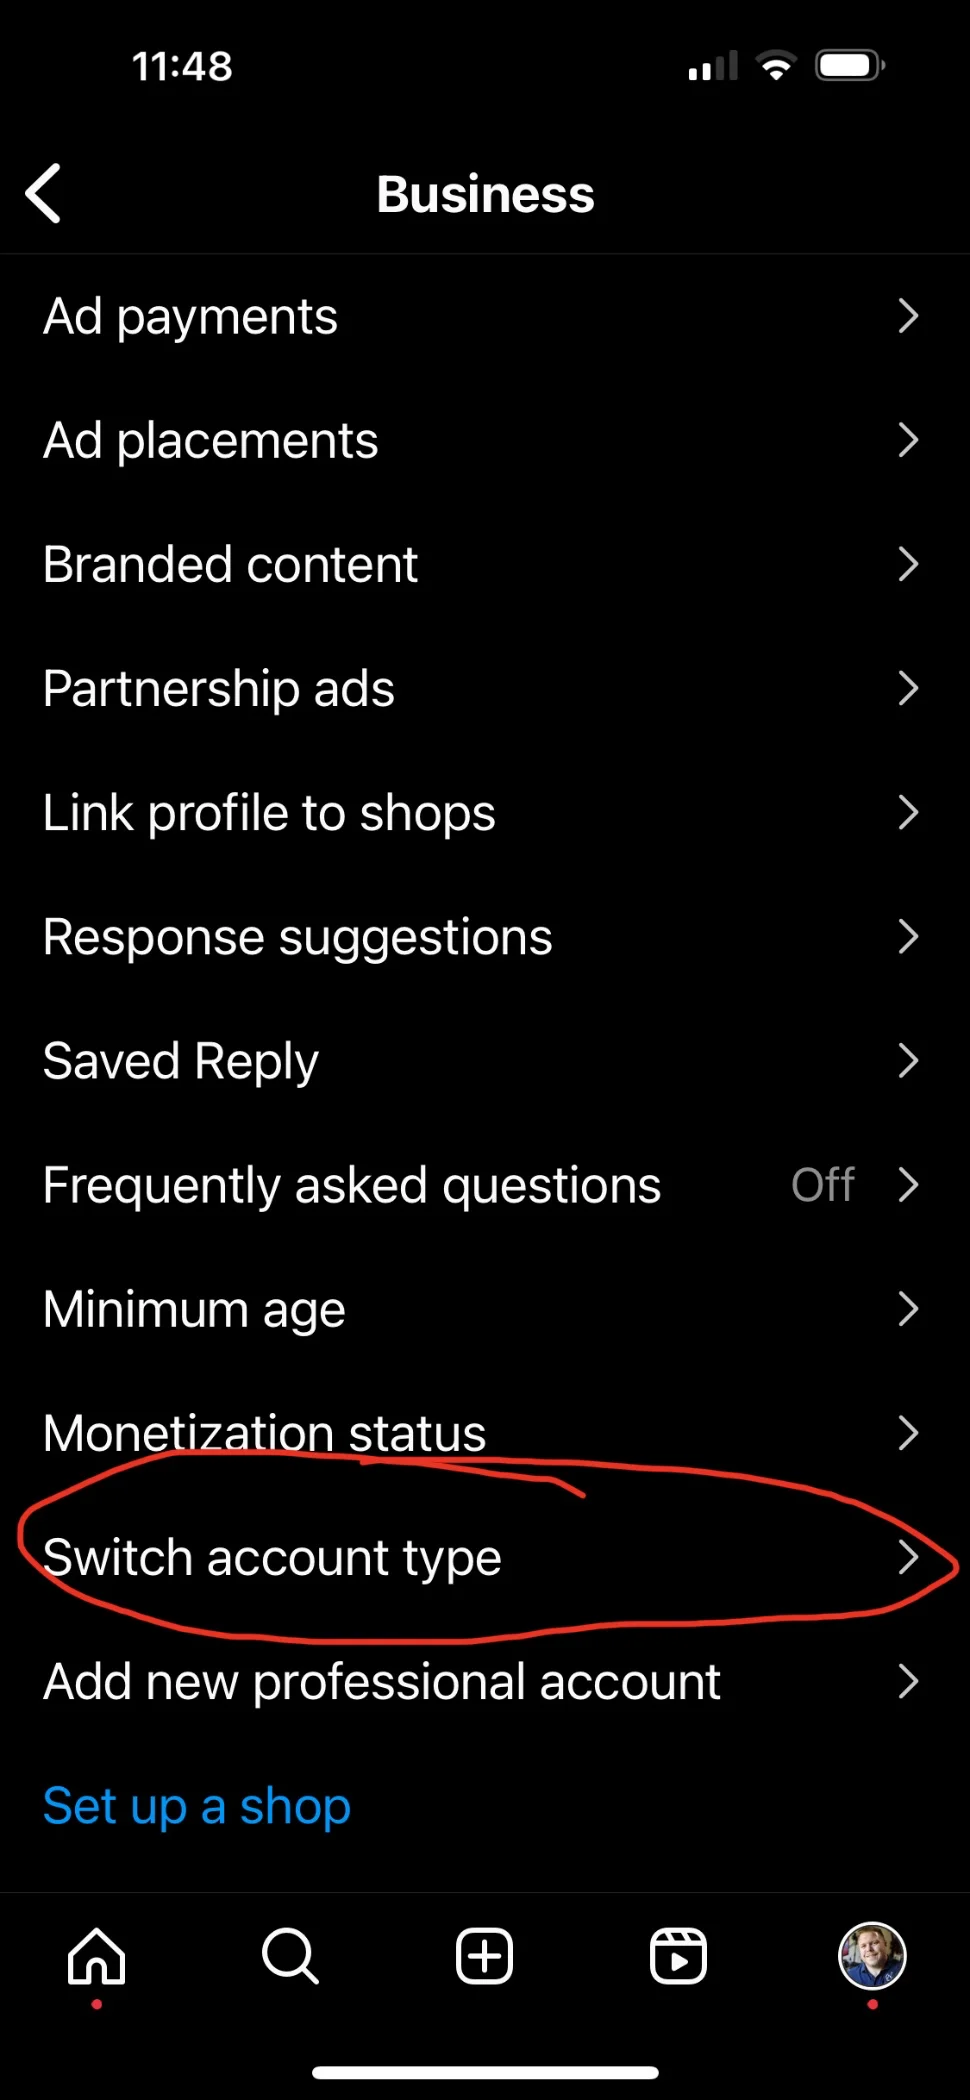
Switch it to a Business Account - which can then get connected to other platforms.

Switching the Instagram account to a business account might look different over time, and we'll try to keep this tutorial up to date, but the bottom line is that you'll want to get it converted so we can actually advertise with it.
Consequences of Going Business
You'll love privacy on some old posts, and you'll end up losing the ability to do the fun copyright songs, so make sure you have one of these really just to do advertising with.
C - Connect the Facebook & Instagram to Meta
Now, you might automatically get added to the Meta Business Suite - but there's a chance you won't.
We need to head to Meta Business Manager.
This is at https://business.facebook.com/latest/home
Once you're at the Meta Business Suite, we want to add in the Instagram Account.
You might get automatically prompted, or you might need to hit the instagram logo on top.
Hit the logo here if it doesn't automatically prompt you:

This is the way to integrate your Instagram with your Meta Business Account on desktop, but you can also do it on your phone.
Download the Following Meta Business Apps:
1 - The Facebook App
2 - The Instagram App
3 - The Meta Business Suite (for doing a little of everything)
4 - Facebook Ads Manager (for managing your ads)
5 - Meta Creator App (for posting)
Once you download the Meta Business Suite, it will probably prompt you to add in an instagram account.
But that might not happen, and it seems the best way to add in your instagram to meta is the desktop login mentioned above.
D - Create a Business.Facebook.com account
In a new tab, type in business.facebook.com
You will probably be prompted to setup an account here.
Now, this is when things get tricky.
We need to get to "Business Settings" inside of a backend account.
There's a backend Facebook system that you'll want to find - called Business.Facebook.com.
What we're truly trying to find is the Business Settings inside that page.
The Business Settings Can look blue or white.
Hopefully, when you type in the Business.facebook.com you're prompted.
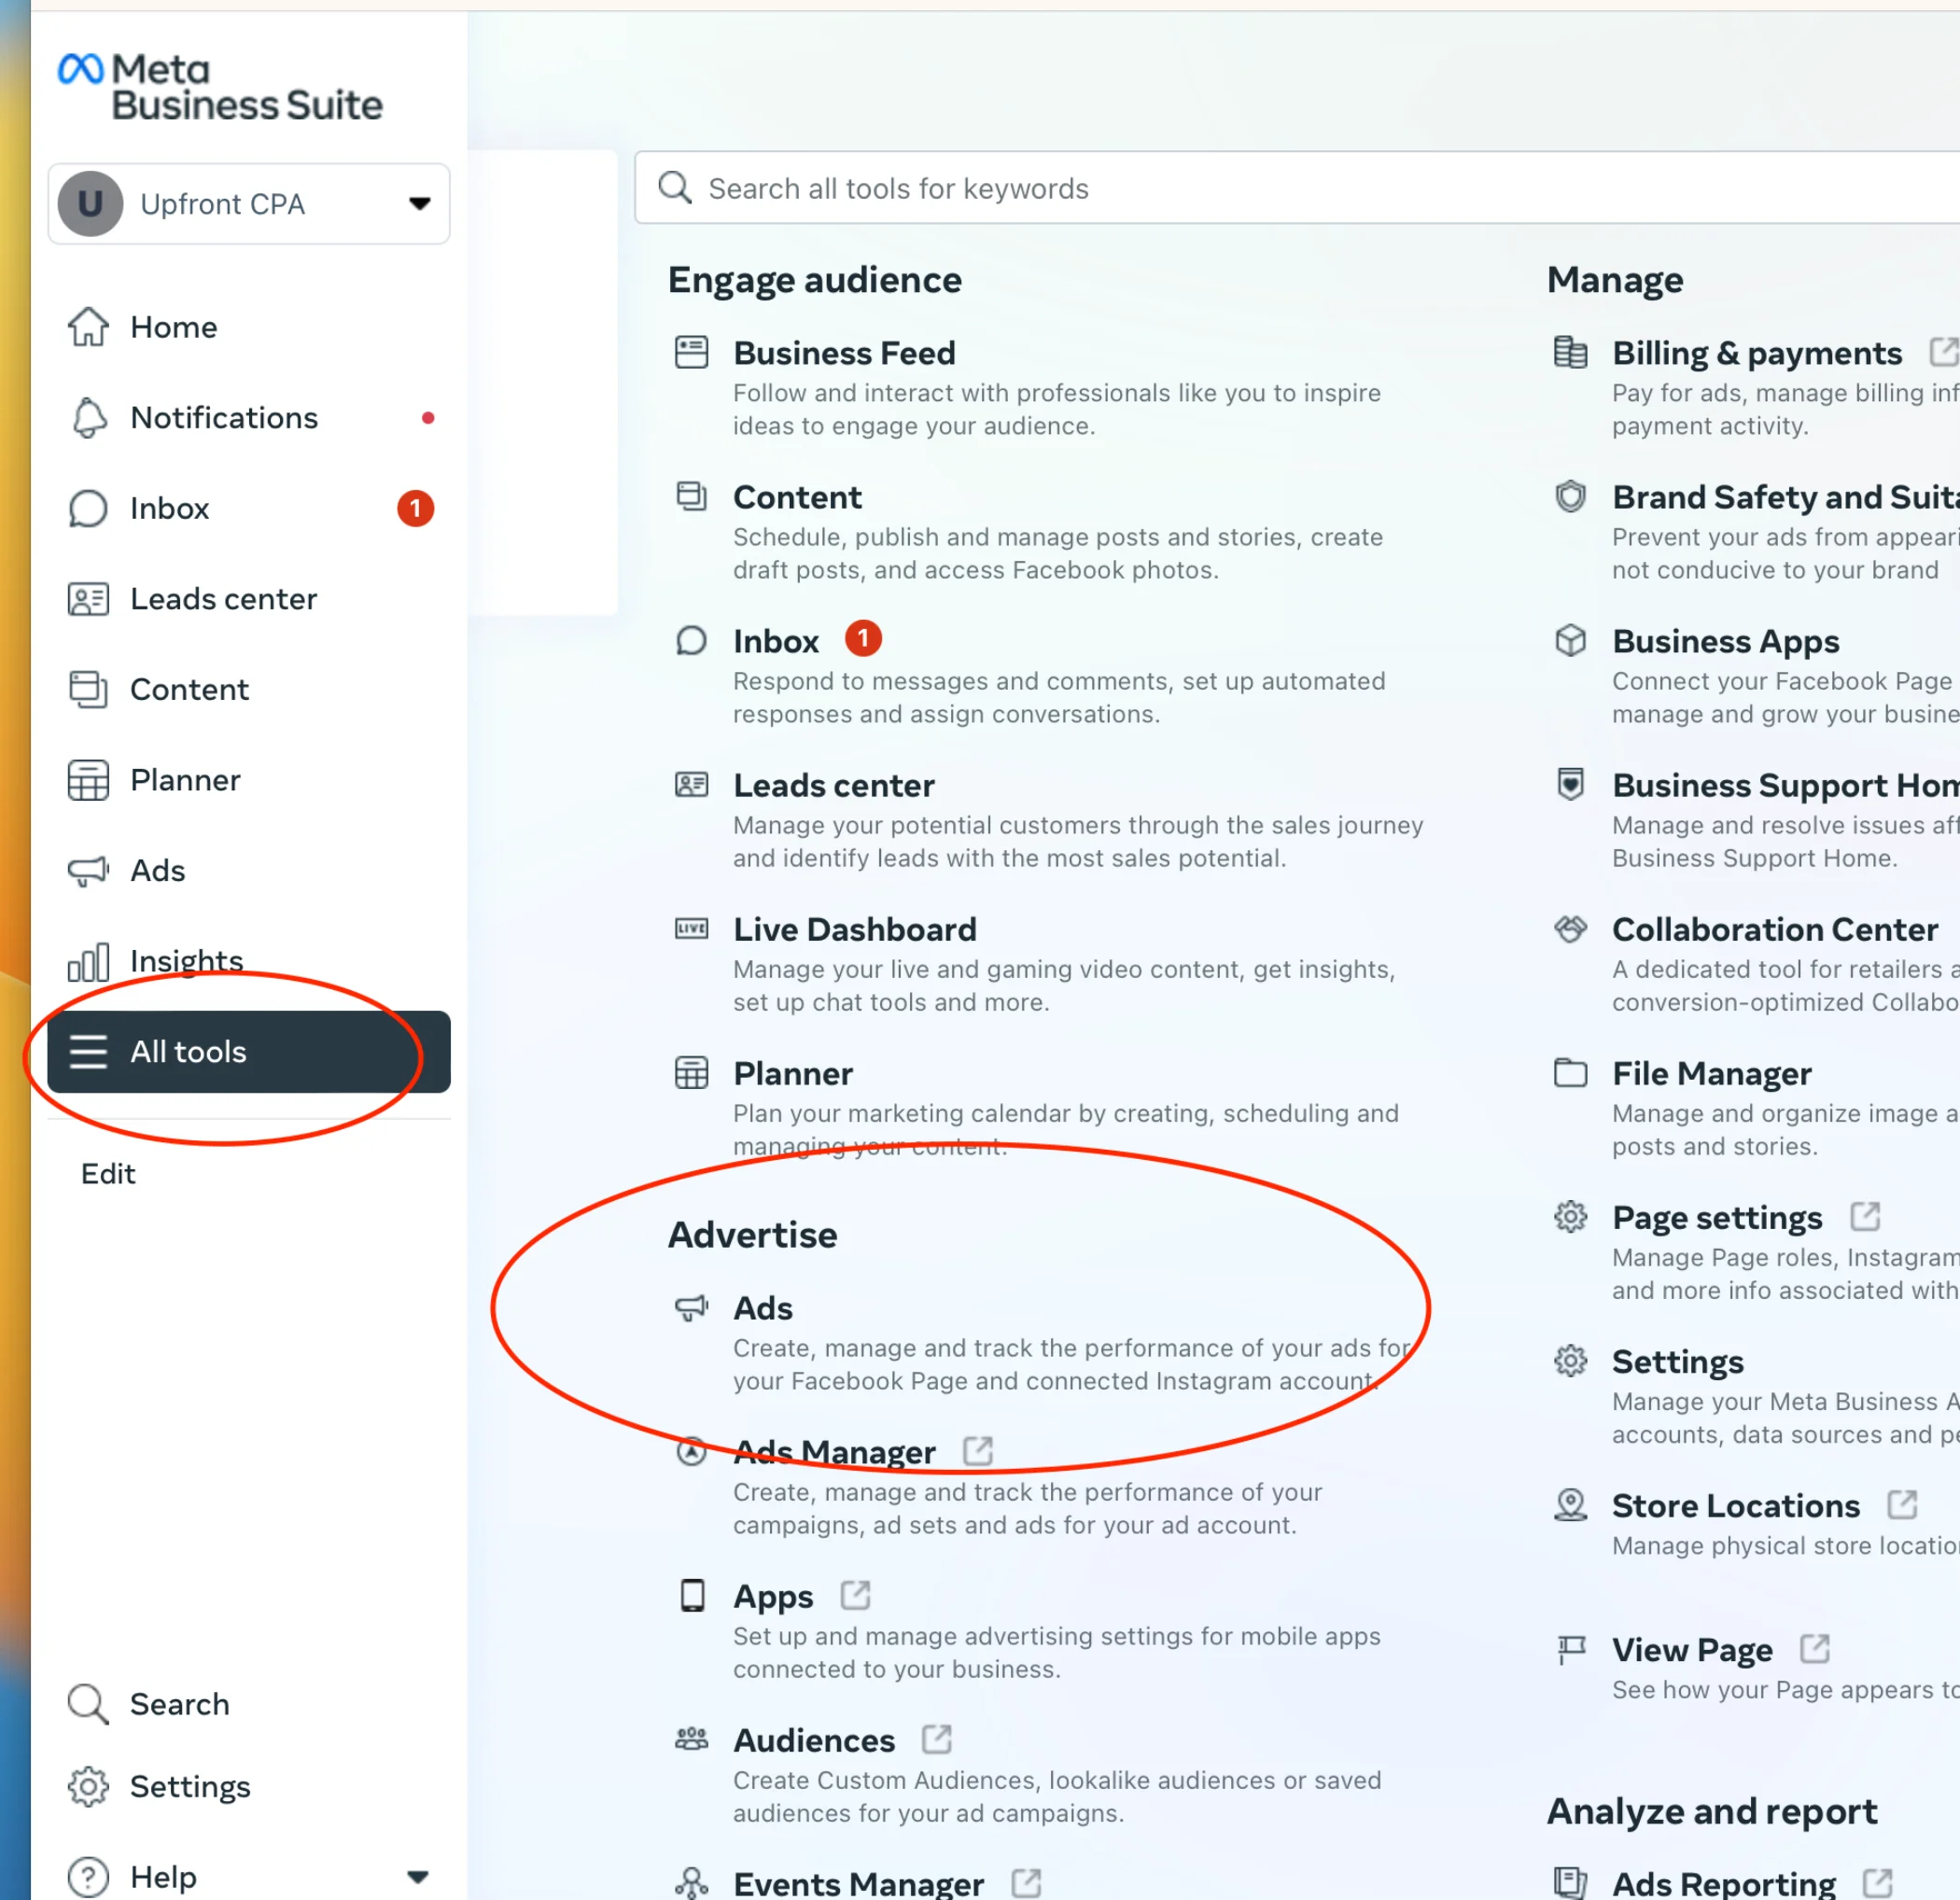
D.2 - Navigate to the Business Settings on Business.facebook.com
Hit the navigation menu on the left, then head to Ads Manager.
Once you're in the ads manager, hit the menu on the left again and go to business settings.
D.3 - Find the Business Settings Page
The Business Settings page is kind of hard to find, so here's how to do it.
Hit the left menu, and go to ADS Manager.
Once you're at ads manager, hit the menu on the left again and go to business settings.
Once you're at the business settings, we will move onto the next step of adding creating an ad account and connecting your other pages and assets.

This is what the Business Settings Page Looks Like:
This is the page we're trying to get to in order to get the next parts of our setup all ready.
E - Create an Ad Account & Add in your Profiles
Now that we're on our Business settings page, we can get everything added & integrated.
We will add in our Page, and turn on permissions.
We will turn on, and then ensure permissions are toggled on and access profided for:
Facebook Page.
Ad Account.
Instagram Page
Here's how to do this.
E.2 - Add in your Facebook Page
On the left, go to pages.
Then, in the middle hit the blue "Add" button.
Select Adda Page.
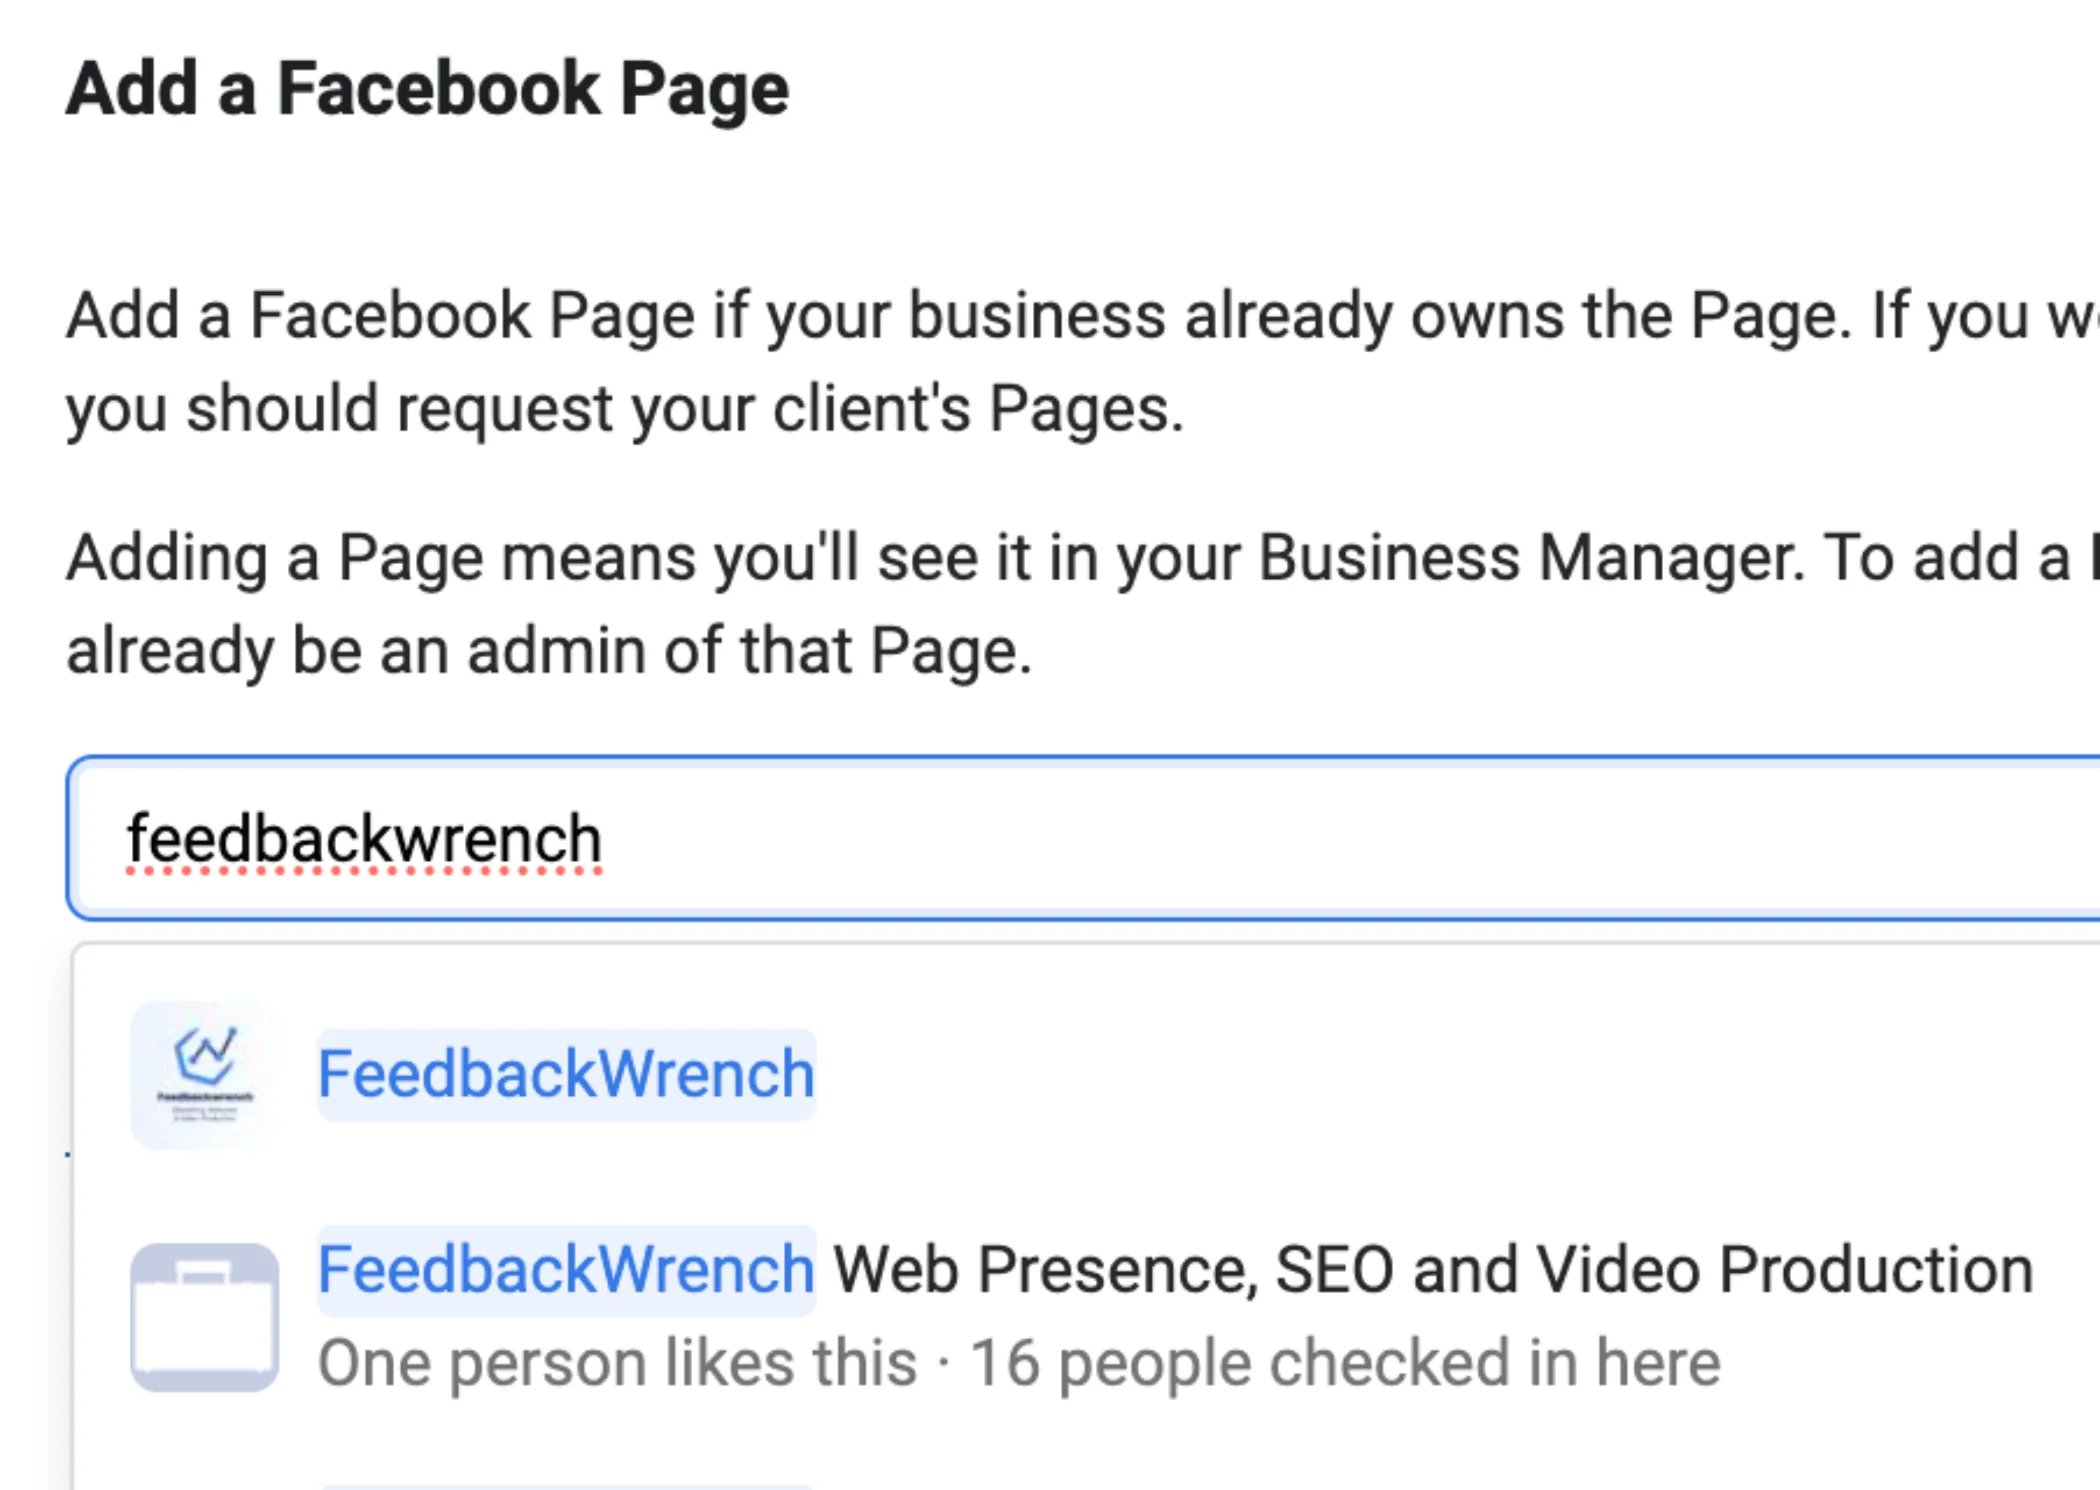
Search for your page name and then add it.
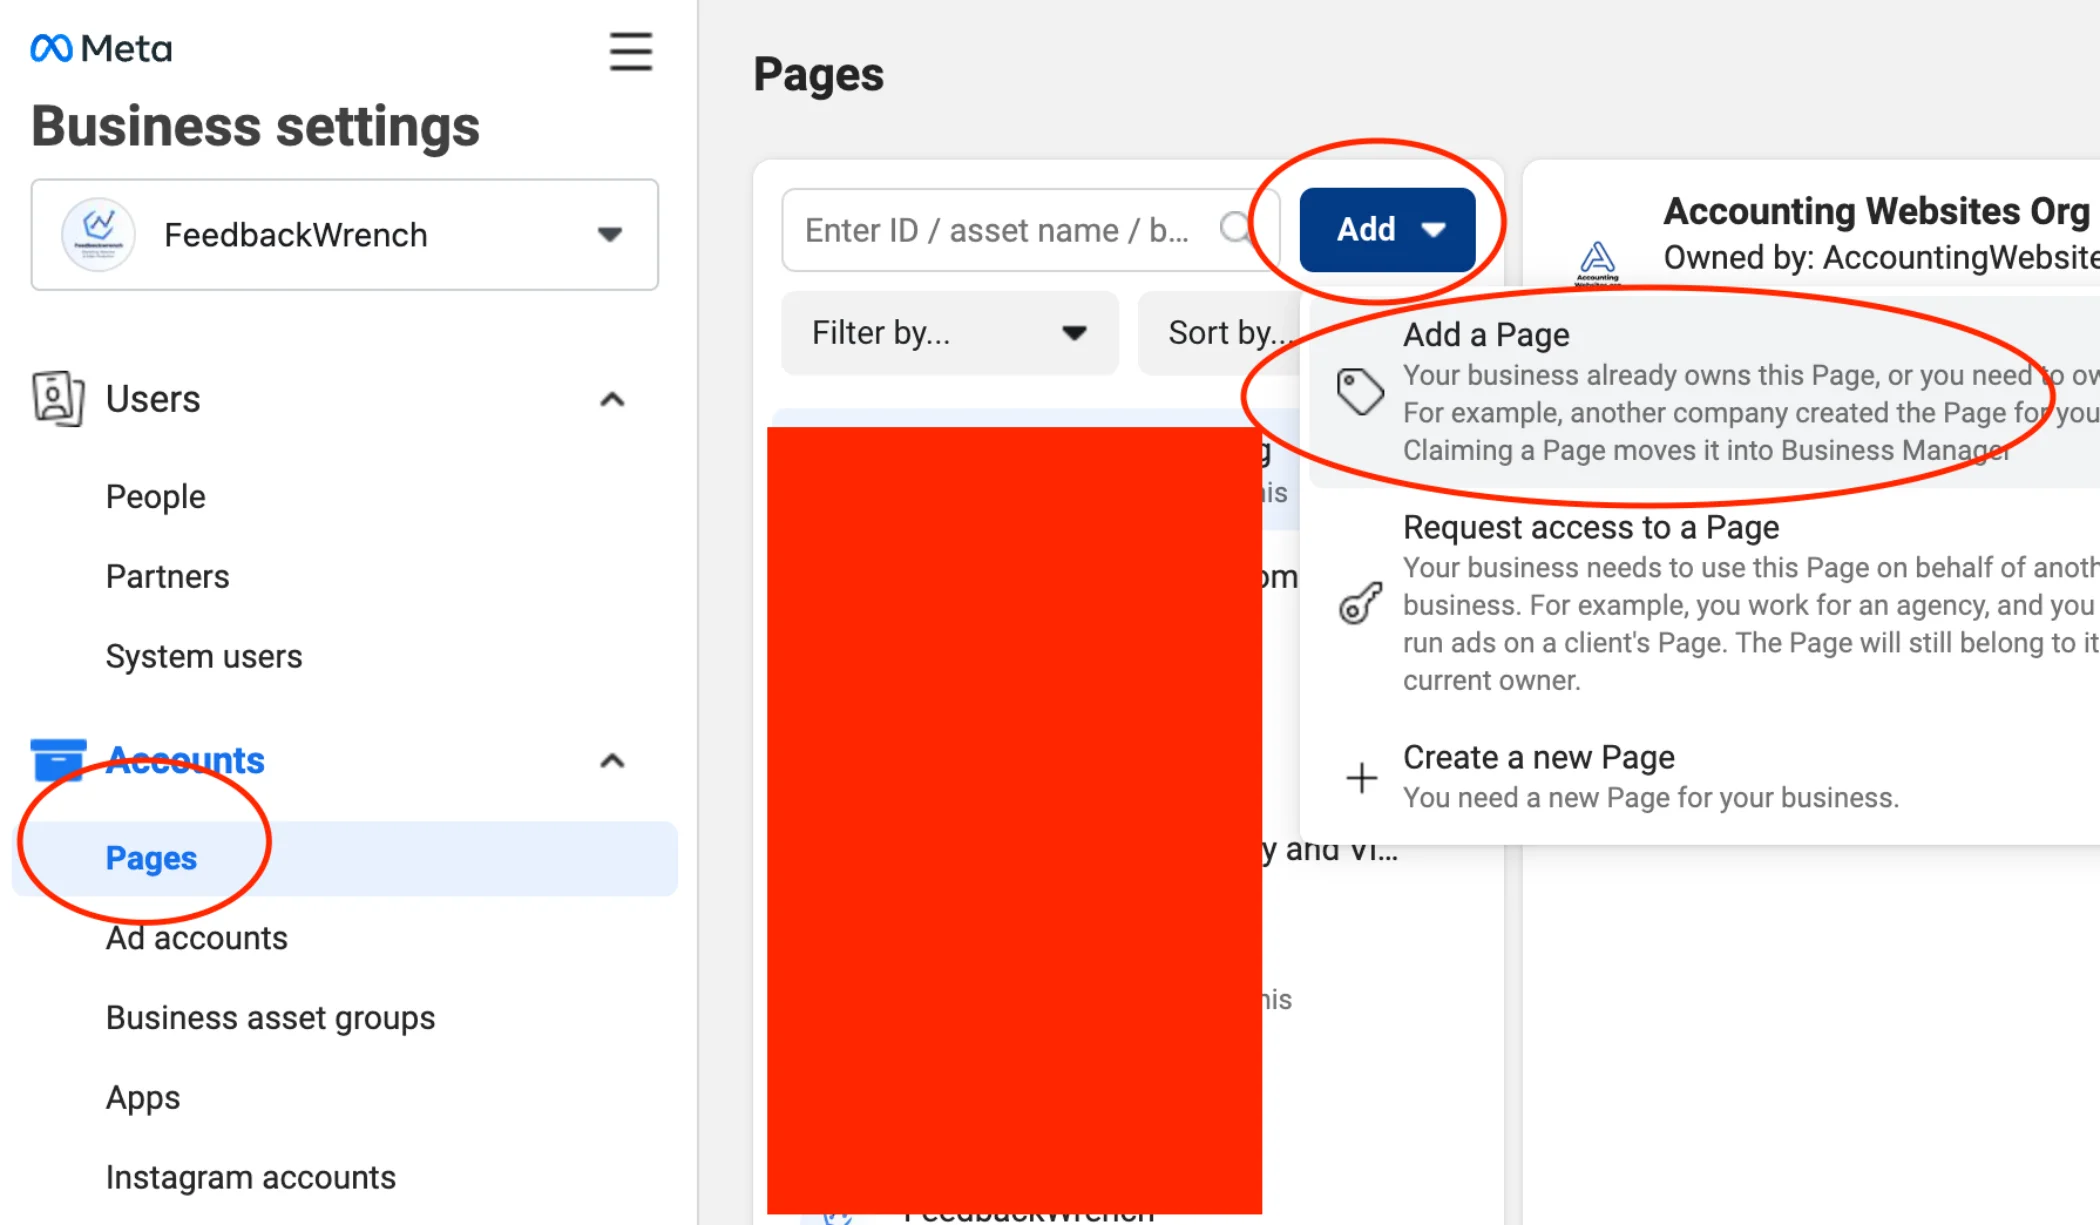
Type in the name of your page and add it here:
Once it's added, let's create an ad Account
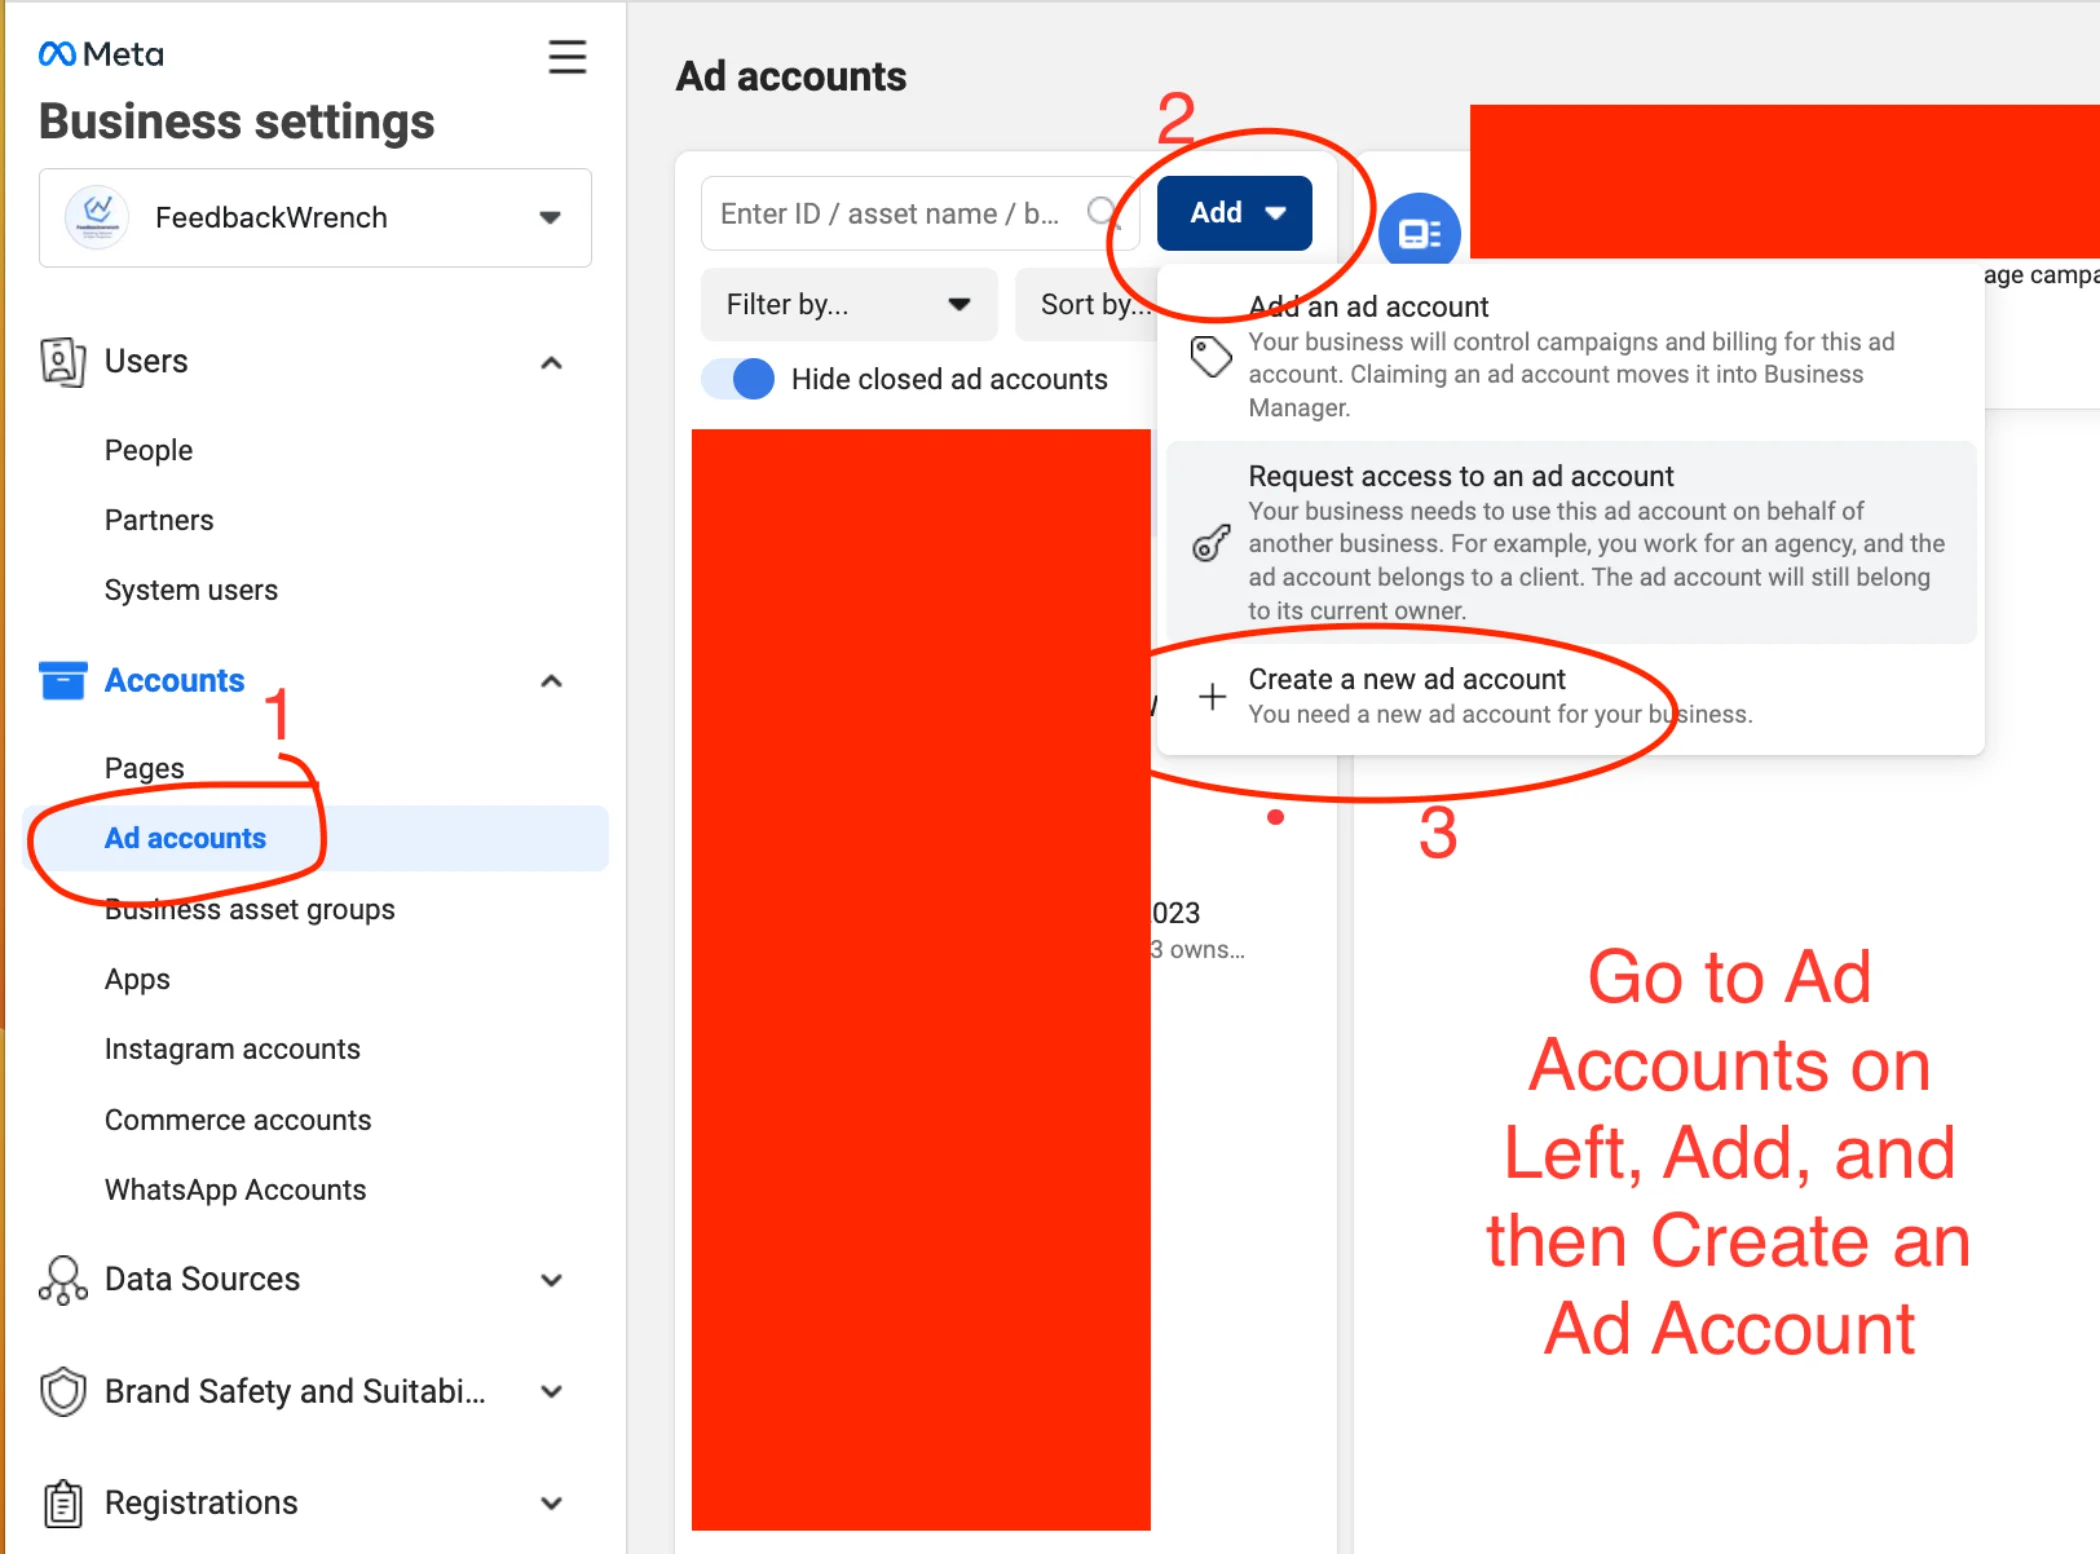
E.3 - Create an Ad Account & Ad You as a Person with Access
Next, go to "Ad Accounts" on the left.
Then, in the middle column, hit the blue "Add" button.
Go to "Create Ad Account"
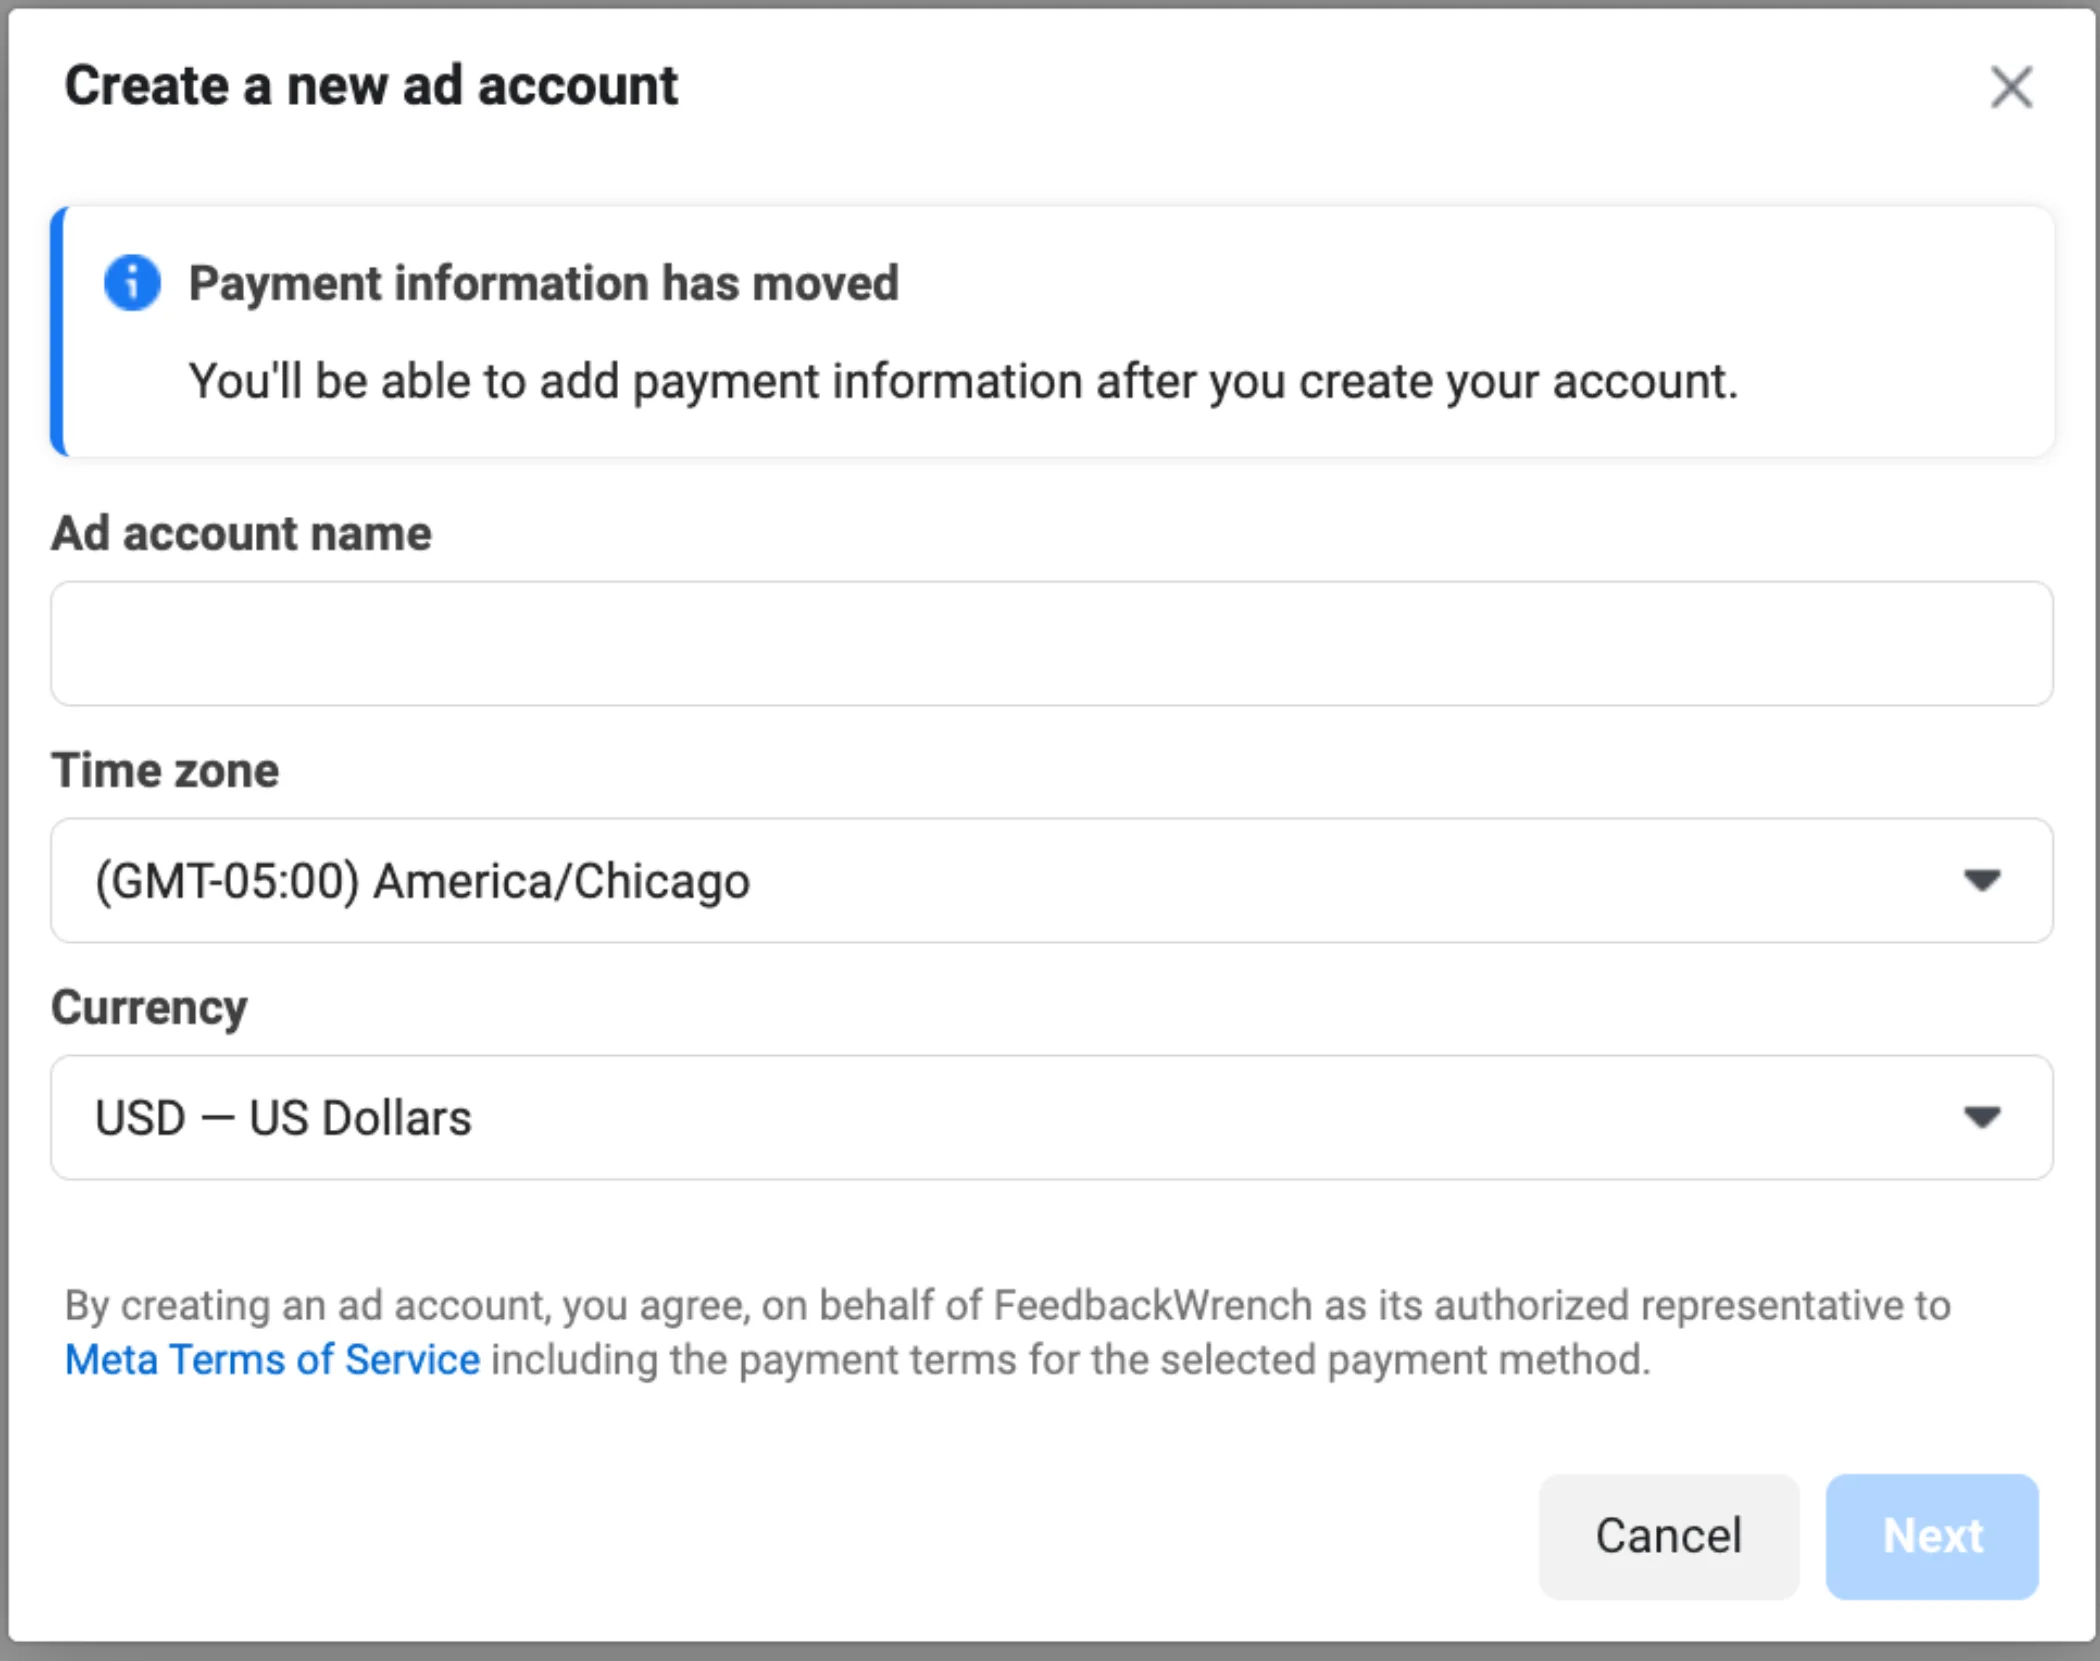
Follow the prompts to fill it out completely.
Once you've created it, it might prompt for billing information, please add this in.
Please turn on all access to the ad account for yourself if it prompts you.
Name it distinctly, and keep moving through until it's completed:
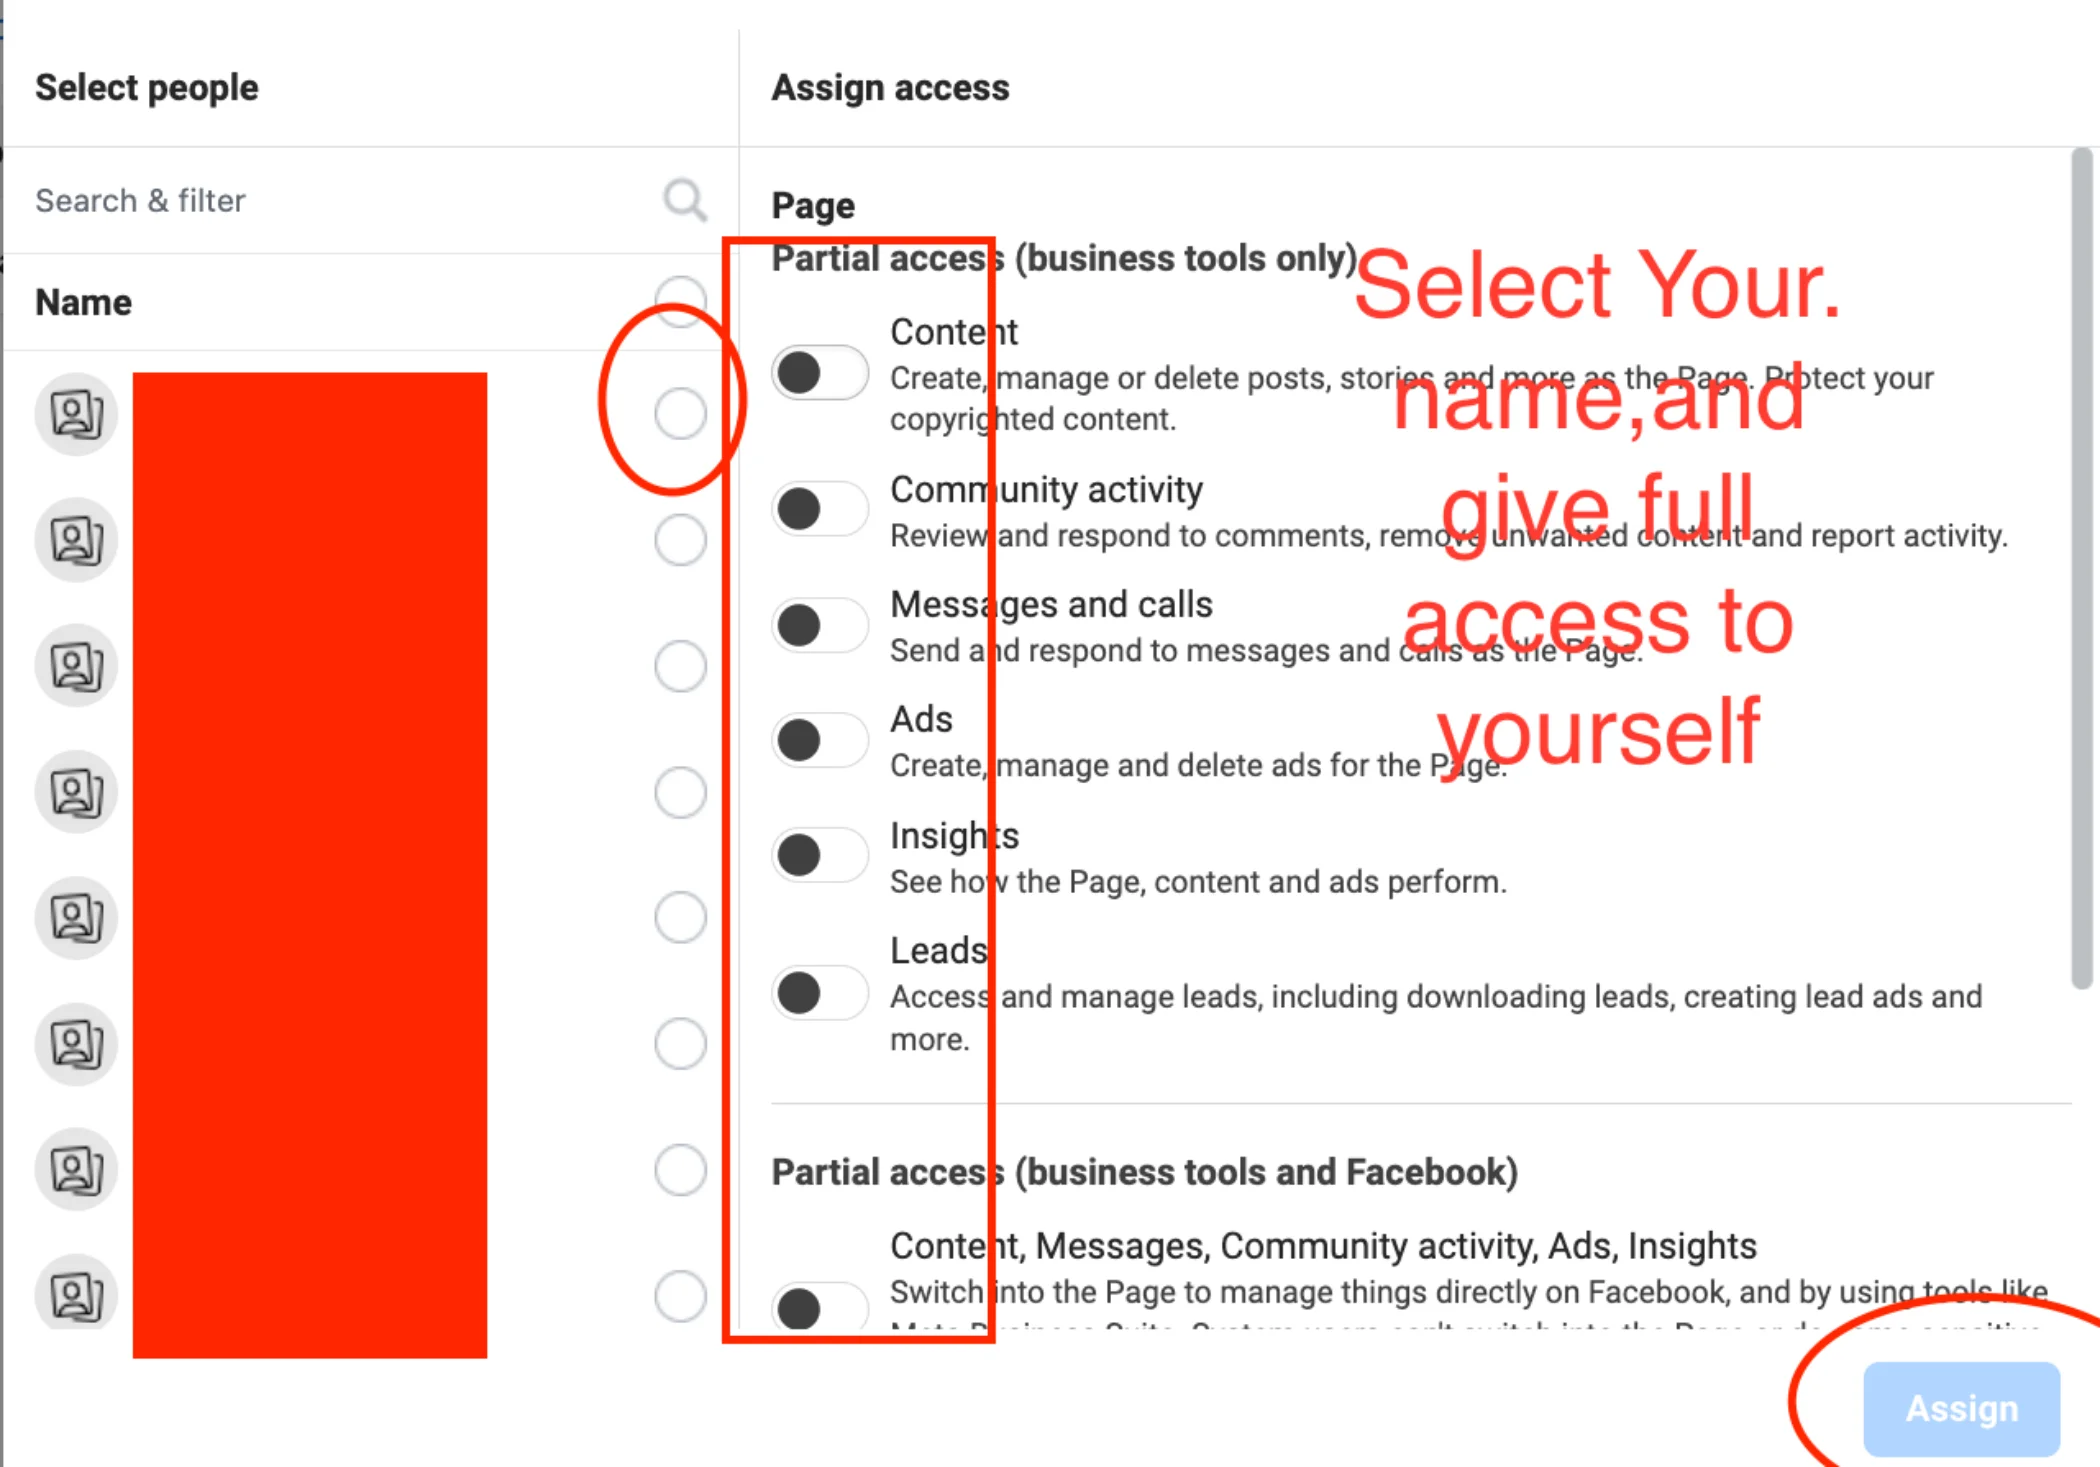
E.4 - Add Yourself to Give Access to the Ad Account.
This is silly, but now select your newly created ad account in the middle column.
Select it, and then go to add people on the far right.
Add yourself as a person, and turn on all access toggles.

You can also add in people's permission by selecting their name in the middle, and then turning on their permissions.
(If you're a Feedbackwrench customer, hold tight and we'll add us in as a partner in a bit)
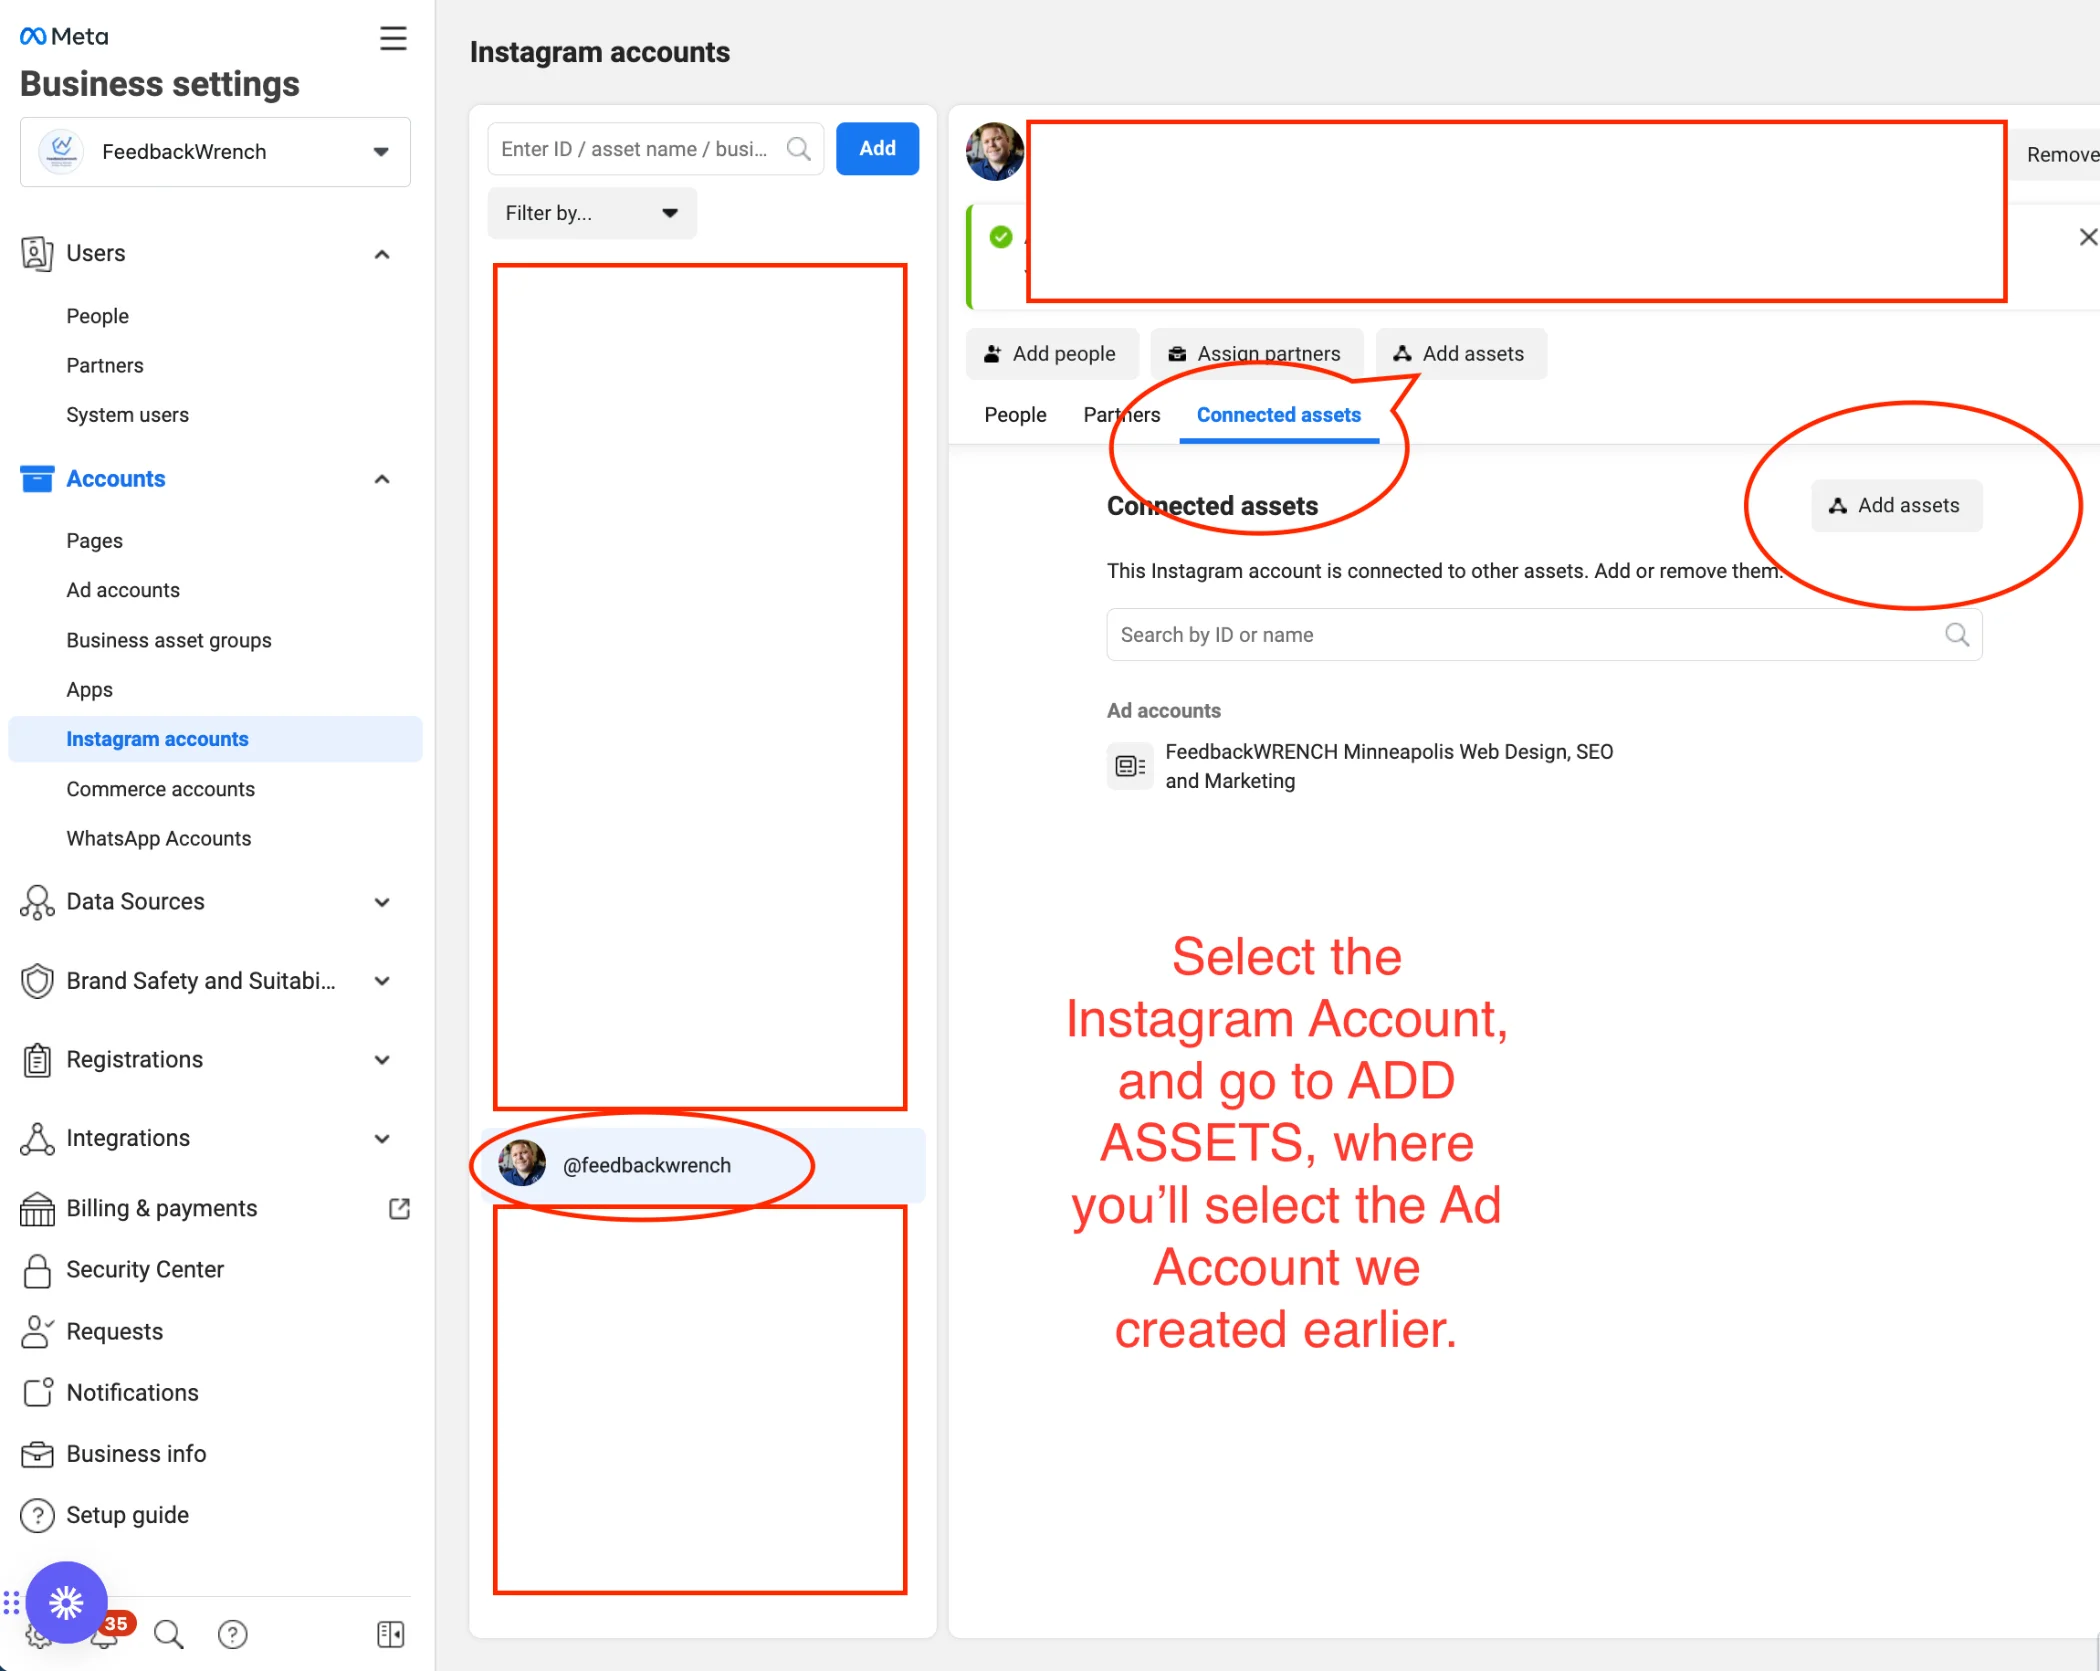
E.5 - Add in your Instagram Account
Now we're going to select instagram pages on the left.
In a new tab, please log out of all other instagram pages, and then log into your primary business instagram account.
NOTE - Log out of all other accounts so you don't add in the wrong page which is hard to undo.
Once we add in the Instagram account, we'll need to Add Assets, and ad in the Ad Account.


Next, be sure to turn on permissions for the instagram account. You could hit "people" and select others and give them permission as well.

YOU MUST CONNECT YOUR AD ACCOUNT TO THE INSTAGRAM!!!
Now, Select your newly added instagram account, and in the right column, hit "Add Assets', where you'll add in the Ad Account from before.
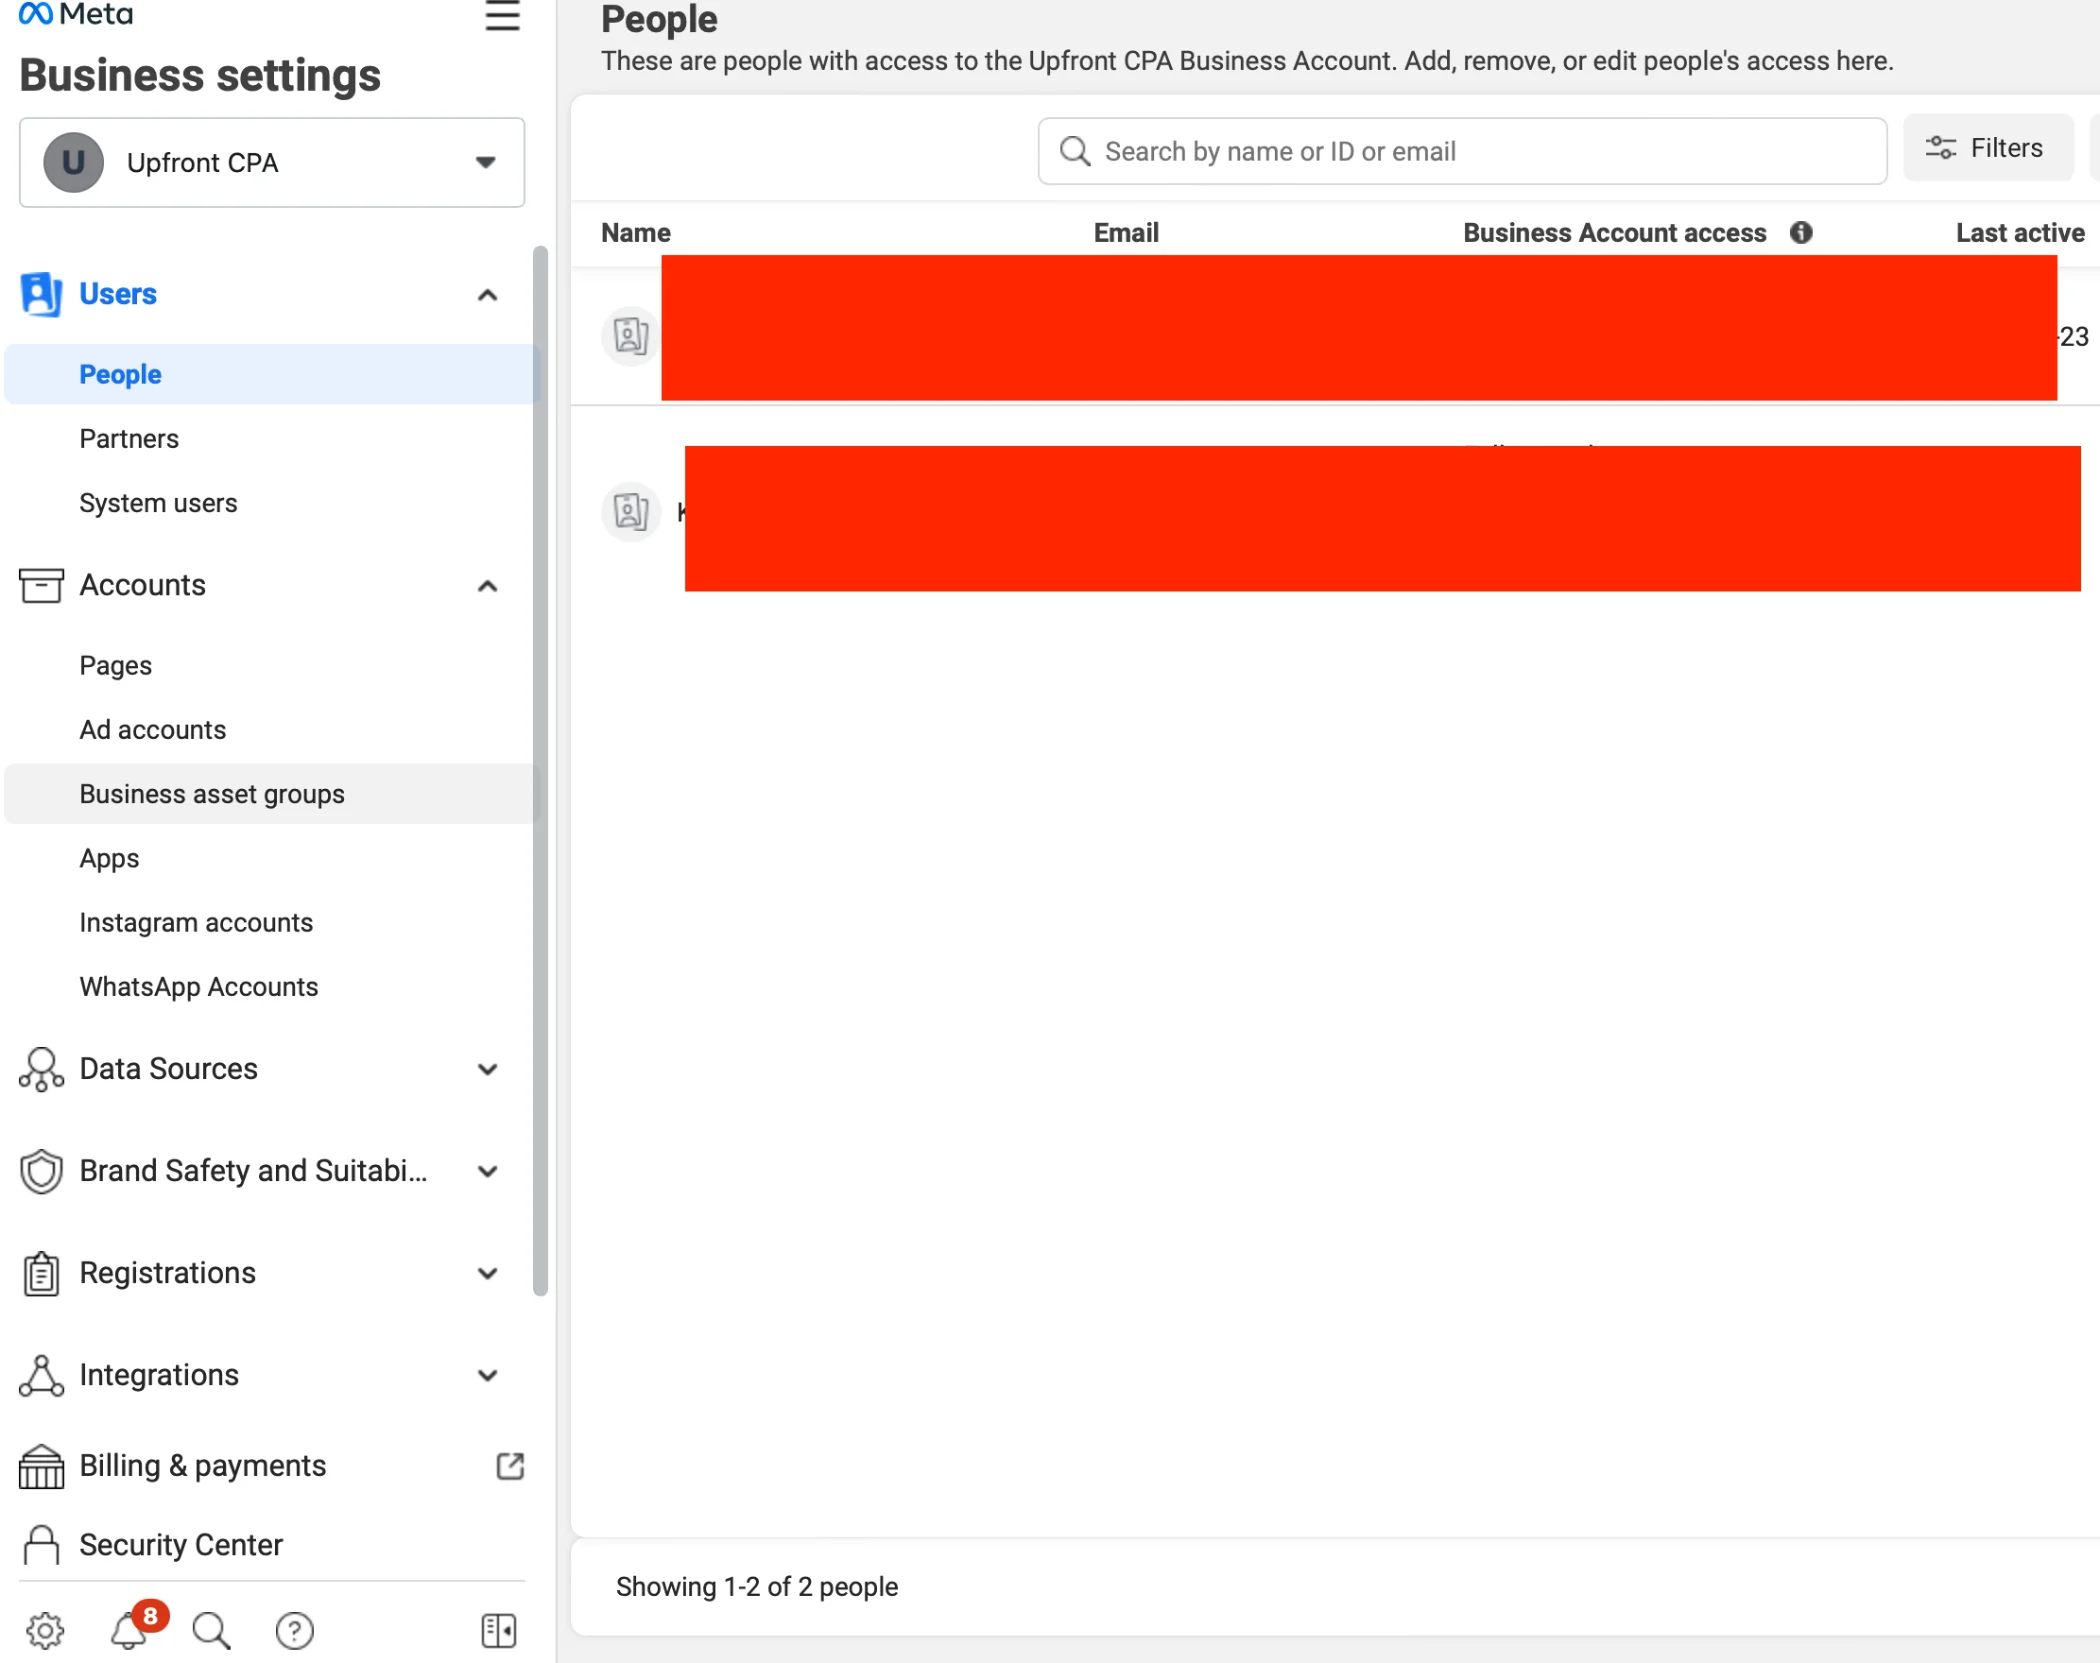
E.6 Please Ad Feedbackwrench as a Partner
On the left, under users, go to Partners.
Please add in your partners number here, and turn on all permissions that are relevant.
If you're adding in Feedbackwrench, we will email that number to you.
Provide Full Access to Feedbackwrench for:
- Ad Account
- Facebook Page
- Instagram Page
- Data Sets if done already.
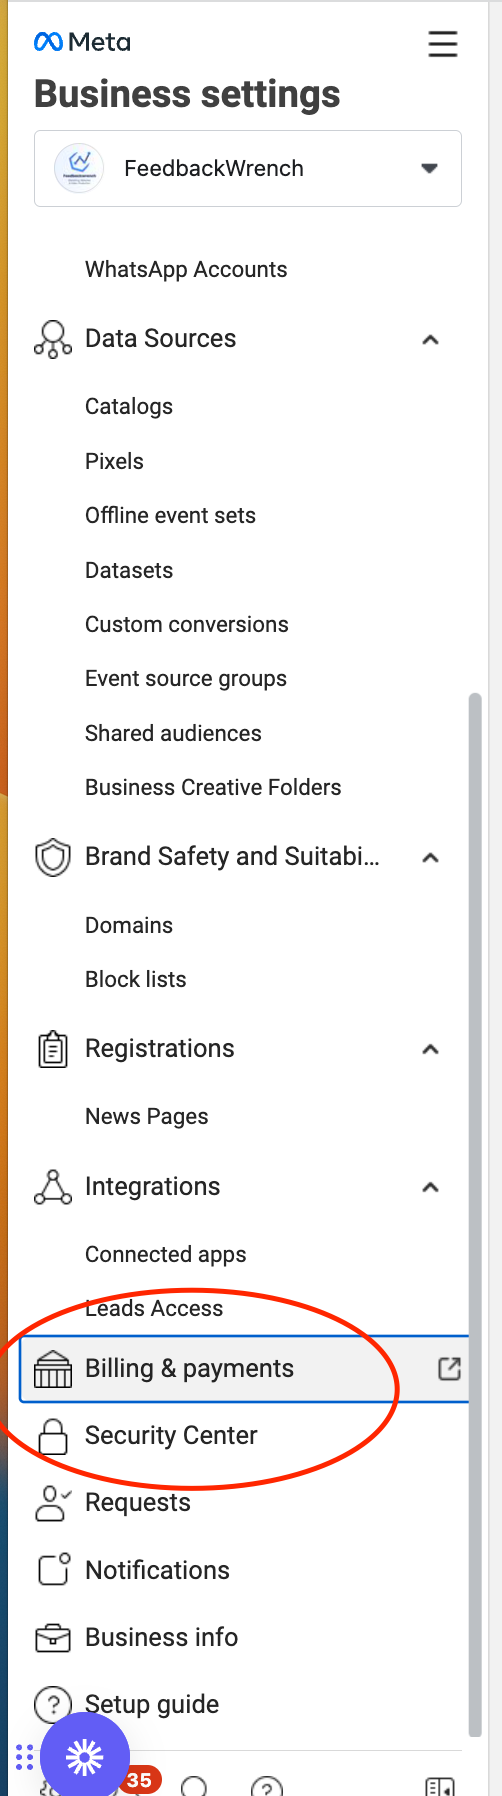
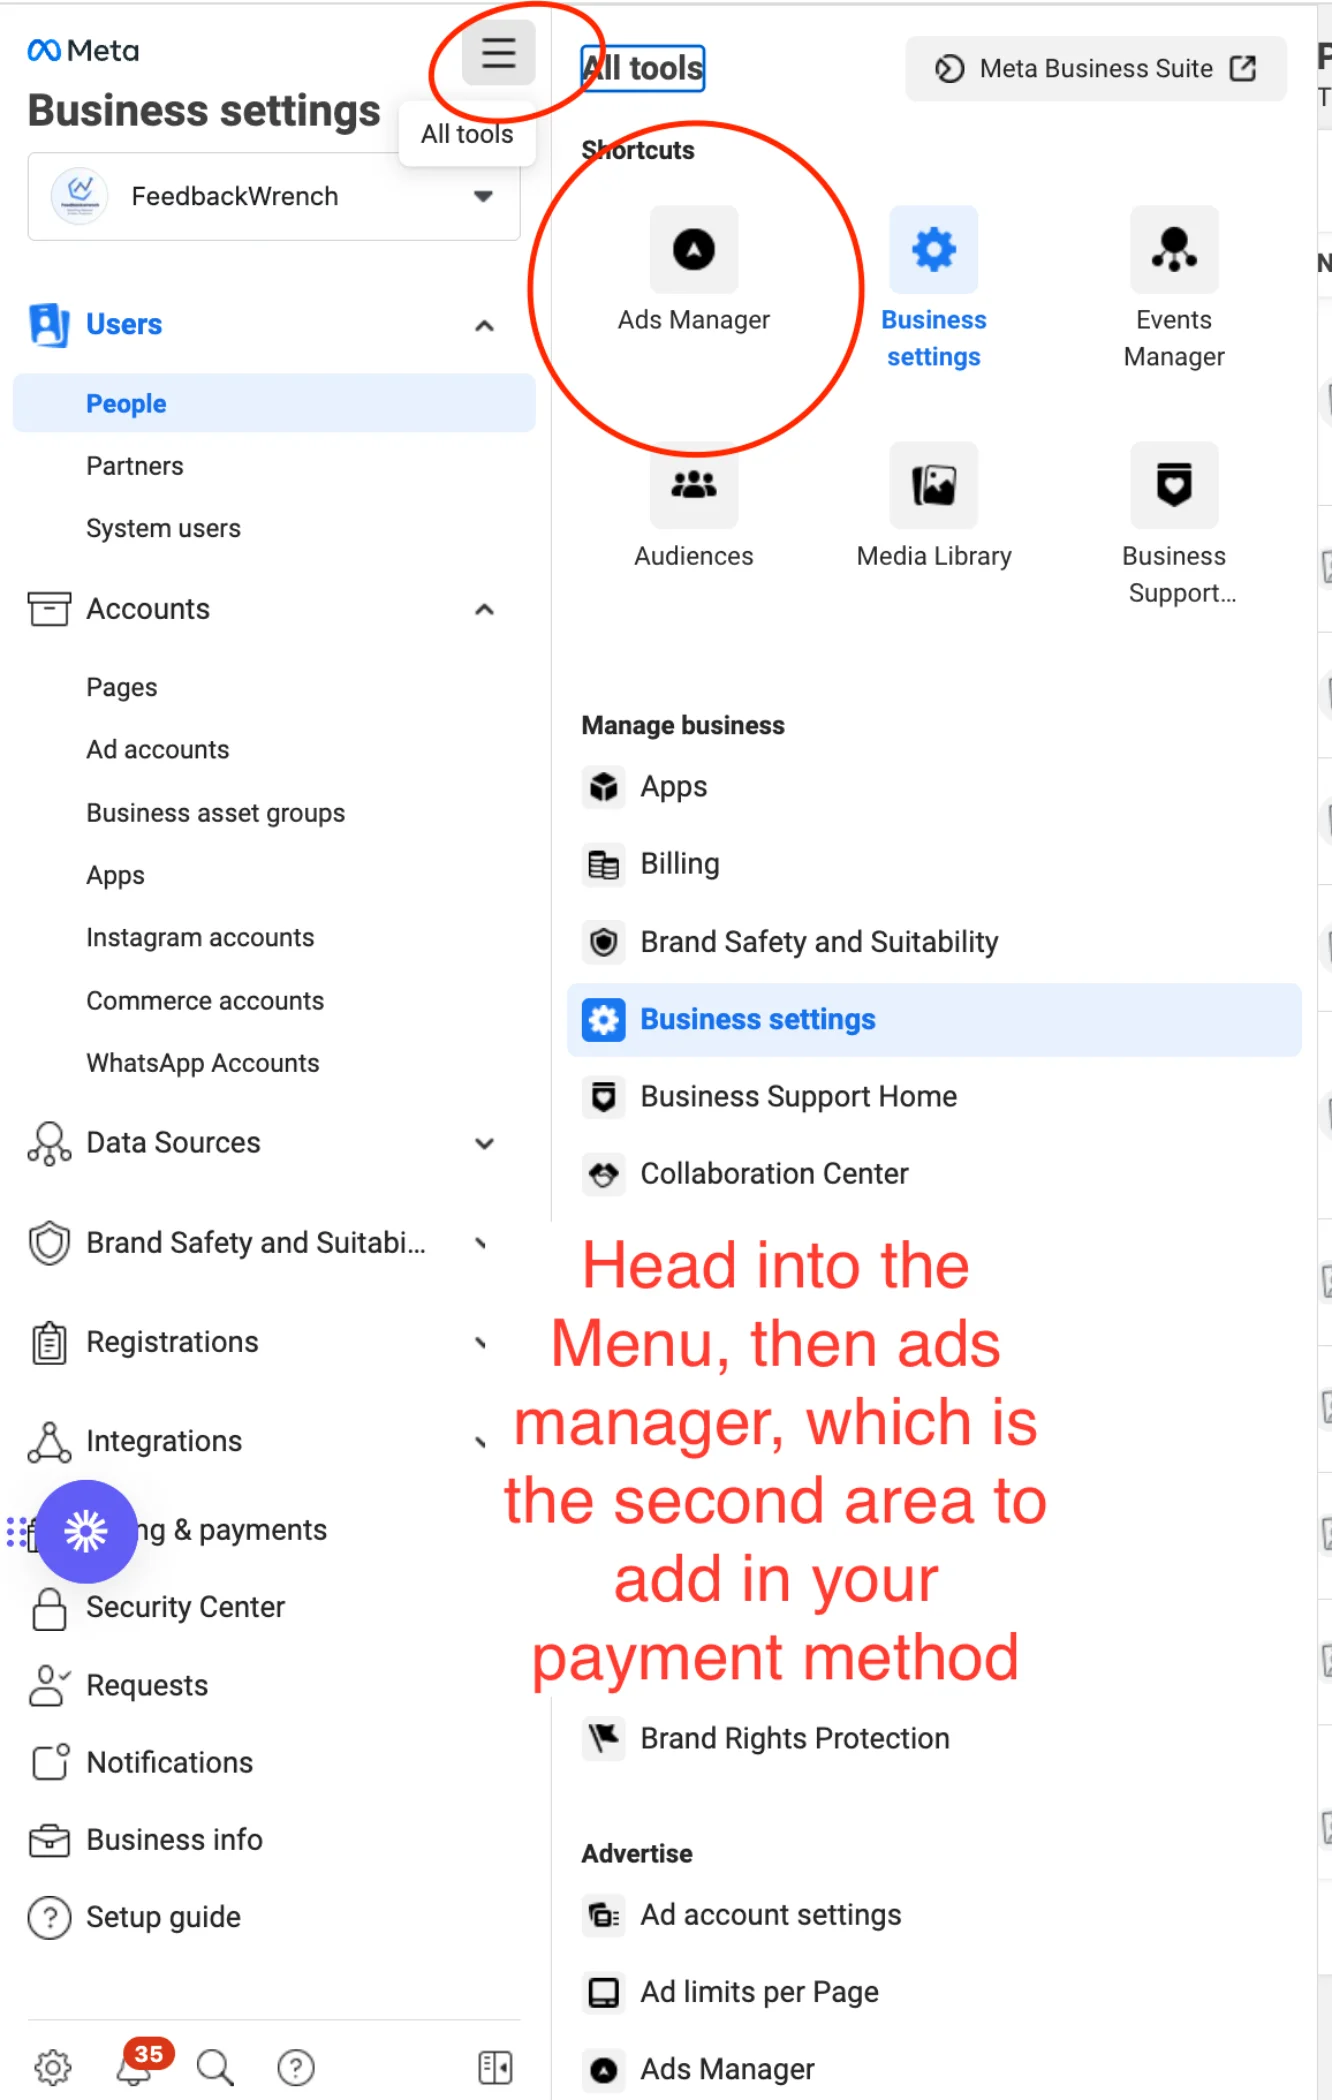
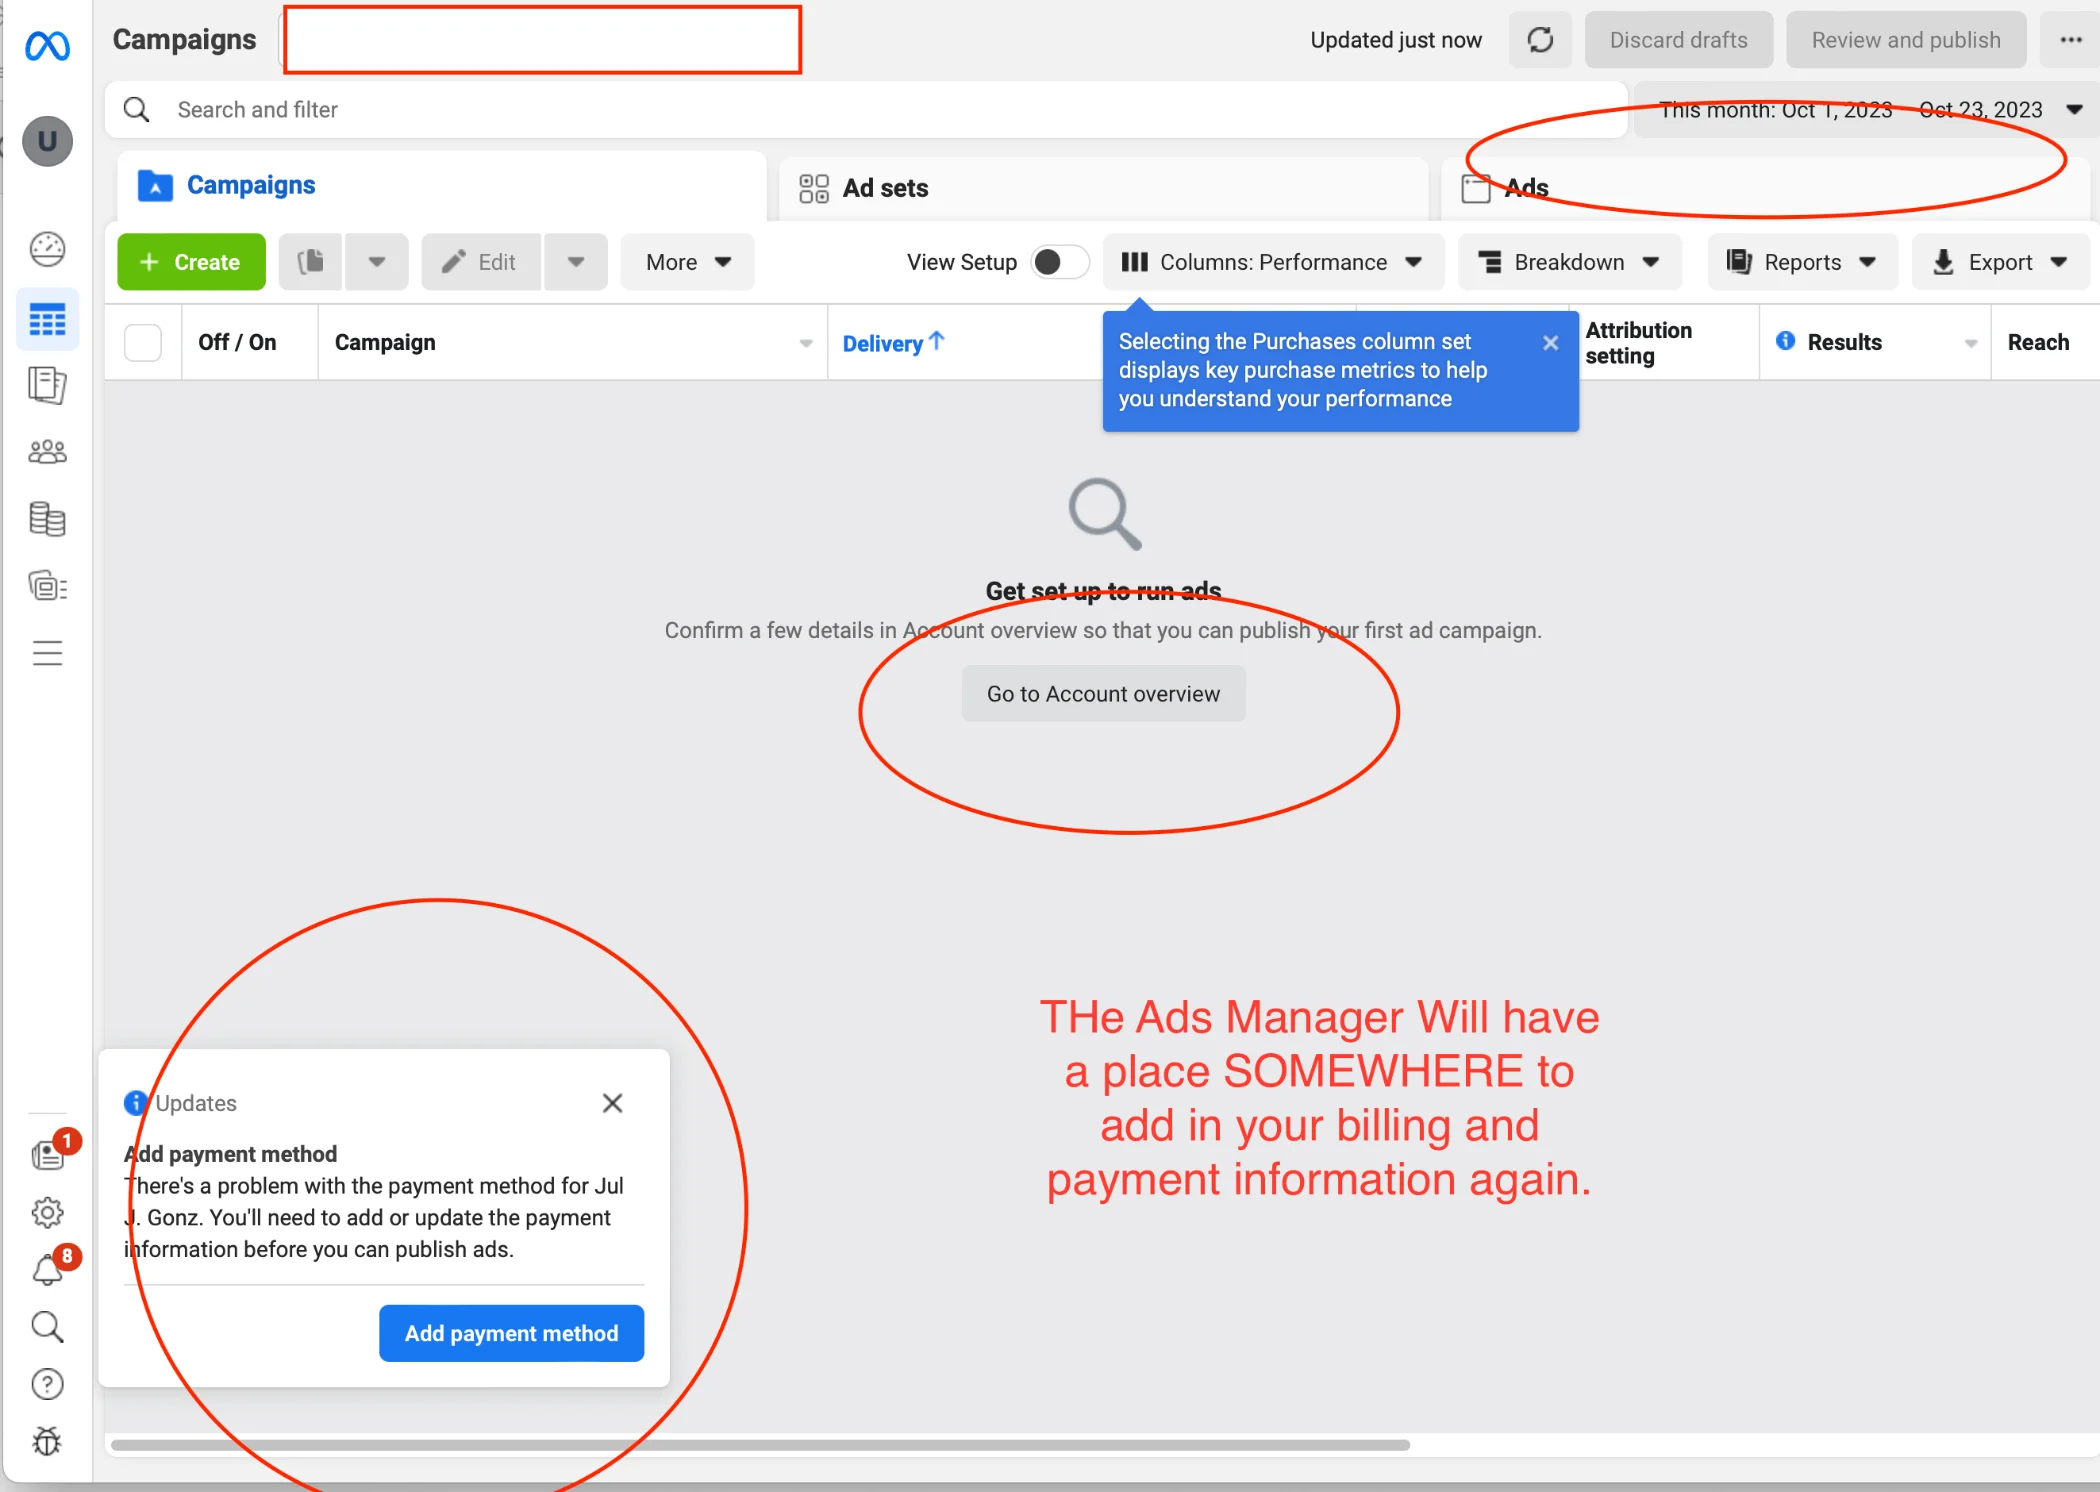
E.7 - Add in Billing Method
We don't know why, but there seems to be TWO locations to add in a billing method.
Two Locations to Add in Your Billing Information:
1 - Clicking Billing & Payments on the Left.
2 - Go to the Ad Manager, and then add payment method.
You will have to look around, there are a couple places you might be prompted to add in your billing iformation.
But the other place to add your billing information is the Ads Manager page.
Free Guides & Blog Categories
We invest heavily in helpful content that assists small businesses owners.


Book a Consultation & Grow Your Business
Book with Rob & the team to identify ways to make the web a fantastic sales & prospecting tool to sell your core services.


©Feedbackwrench All Rights Reserved.